Inspiration time! Thanks to FlashBus and the associated flurry of Googling (and subsequent money spent on off-camera flash gear), I decided to take a stab at making a light tent.
Before I begin, you should start this project by asking yourself what you want to be able to do with your light tent. Are you just going to photograph small items (jewelry, etc?) A big box like this may be overkill. I opted for a rather larger variety, as I knew I wanted to be able to take pictures of larger items. Do you want more flexibility in hard / soft light? This may not be for you, as you're going to get very soft light out of this almost no matter what you do. My goals were just to do some basic product photography for all those times I sell things on POTN, so my requirements were pretty lax. Yours may not be, so keep that in mind before starting.
Another thing to keep in mind is that this is just a recipe, not some proscriptive set of instructions. For example:
- I chose to make 3 windows, and leave the back of the box intact, maybe you want to put a light behind your background, in which case you'll want to remove the back of the box, as well.
- Maybe you don't want to use paper for your window material, for fragility / light diffusion reasons.
- Maybe you want something more robust and not made out of what is effectively tree-pulp :).
That said, I'll show you how to make a pretty simple version which will get you stupidly good light for less than 10 dollars.
Full Flickr set can be found here.
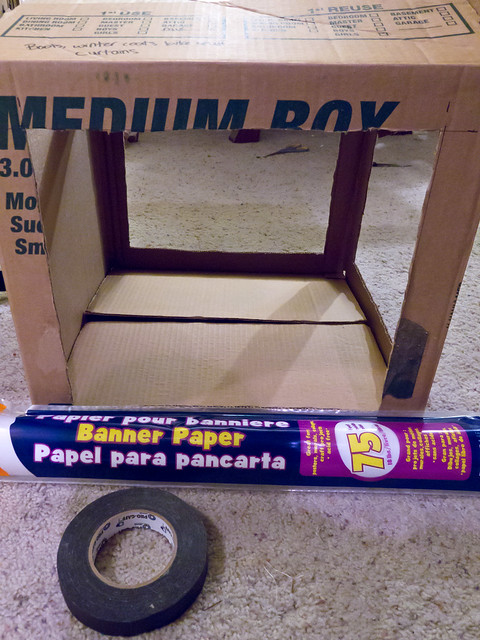
What you'll need…
- 1x Cardboard box of sufficient size (the one I chose was 16"x18"x18")
- White Banner Paper
- Gaffer's Tape
- Thin Sharpie or Pen
- Scissors
- Knife / Box Cutter
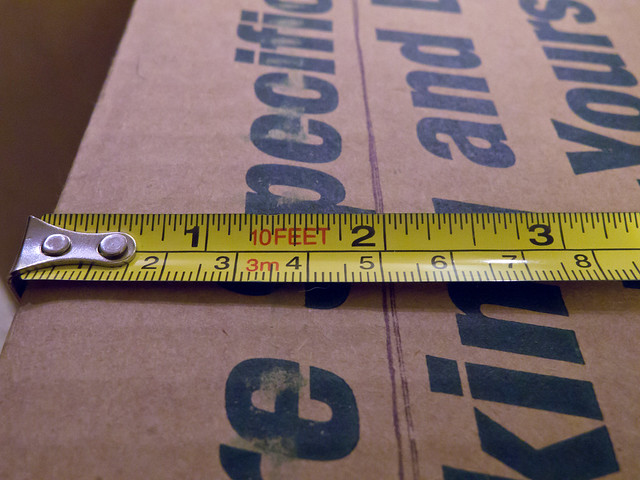
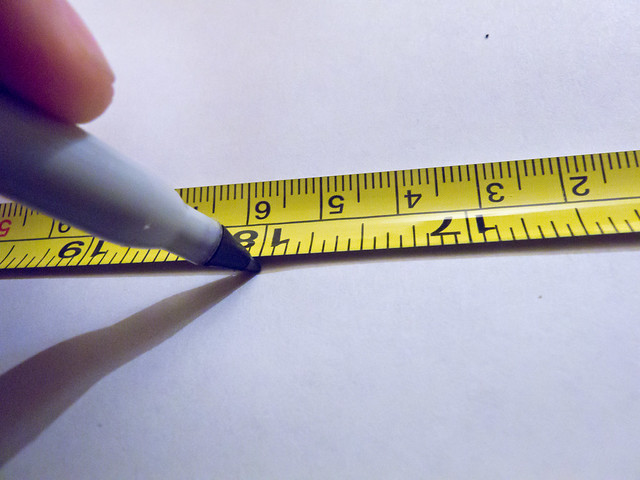
Step 1: Measure your window opening
You are going to begin by measuring windows on 3 of the sides of the box. Each of these windows should leave 2 inches on each side to allow you to attach your diffusion material and to give some structural integrity to the final product.
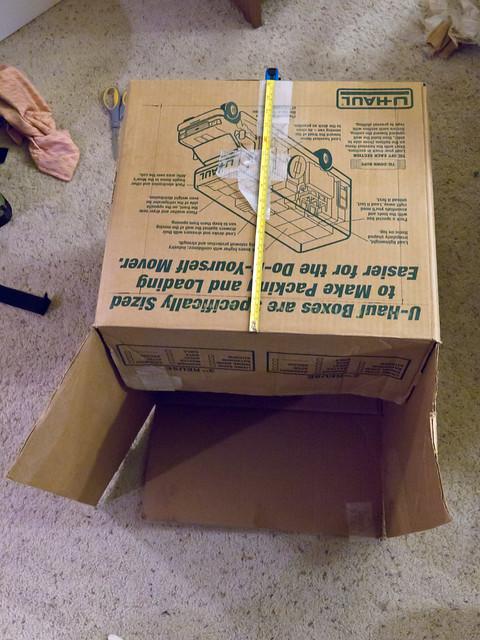
DIY Light Tent Build (Step 1) — Map
DIY Light Tent Build (Step 2) — Map
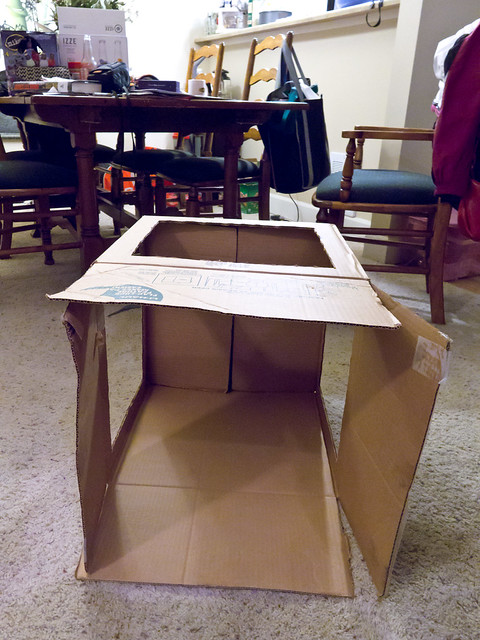
Step 2: Cut out window openings
Next, cut the window openings out with a sharp knife or box cutter. I recommend using a box cutter if you have it. Scissors will leave really bad lines and could damage the cardboard. I actually used a kitchen knife, but I do NOT RECOMMEND THIS. I am not the safest individual. Your box should look something like the below.
DIY Light Tent Build (Step 3) — Map
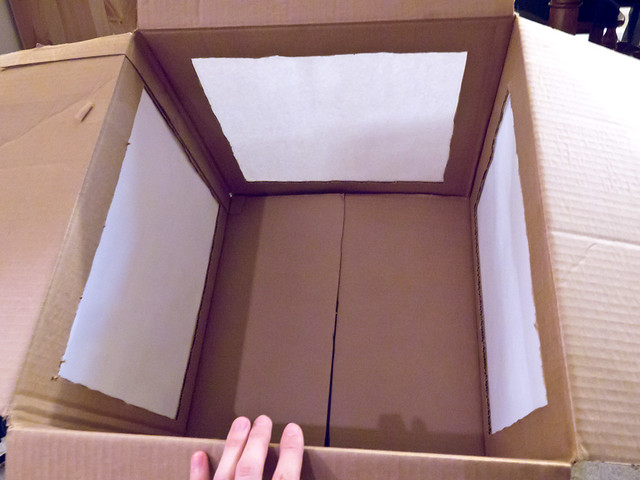
Step 3: Attach window diffusion material
Next, you're going to want to cut out squares of diffusion material that are slightly larger than the size of one side of your box. In my case, I cut a 20 inch piece of my banner paper, taped it along two edges of the window opening, and cut off the excess.
Do make sure that you leave enough space alongside the window borders to attach your diffusion material (I chose about an inch). This is also why 2 inches of border is a good choice, as it gives you some working space.
DIY Light Tent Build (Step 4) — Map
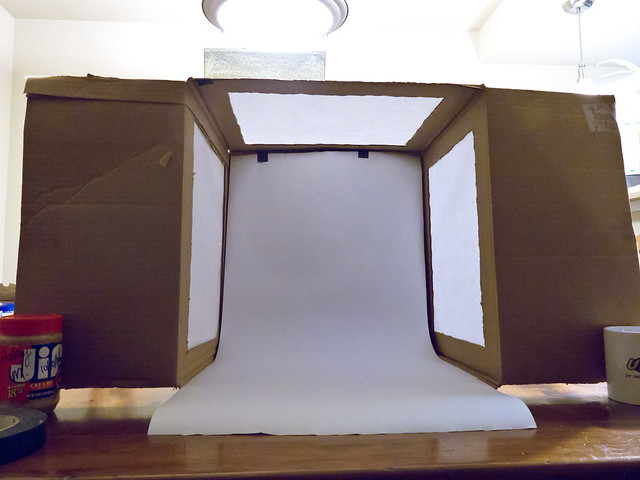
Your finished light tent should look something like the below. Notice that I have left the front and rear box flaps on. This will be important for a couple of reasons later on.
DIY Light Tent Build (Step 5) — Map
Step 4: Measure and cut seamless background.
Your final step is to pick a background material, and cut it (if necessary) to fit the inside of your box. I chose to use banner paper again because it can be folded easily in the box and can be taped up to the top inner edge without issue. Card stock would work well, too. One note: make sure that you leave 6-12 inches of background coming out of the front of your light tent. This will let you fold the background forward to act as a reflector.

DIY Light Tent Build (Step 6) — Map
I actually cut at about 17.5 inches, to leave a bit of room on the edges of the inside of the box so the paper wouldn't get bunched up.
DIY Light Tent Build (Step 7) — Map
Step 5: Add background to light tent, enjoy!
Once you add your background to your new light tent, you are done! Start to take some shots and be impressed by how brain-dead easy it is to get soft light. A couple of notes before I show some example images.
- Leave the inside box flaps – this will allow you to hang your background easily (as you can see in the image below).
- Leave the side box flaps on in the front – this will allow you to flag your flashes if you have back them away from the side. It also allows you to protect the inside background when you aren't using your light tent.
- Leave the bottom box flap on in the front – this will allow you to prop up the extra background you left in step 4 for use as a reflector
- Cut off the top front box flap – this serves no purpose and will just get in your way
DIY Light Tent Build (Final) — Map
Example Photos
Here are the first few shots I took with this light tent. They are all straight out of camera with zero editing, to give you a sense of what this setup is capable of. Tech details are below:
- 2x 580 EX II @ 1/8th power, Zoomed to 24MM angled up on the left + right sides of the box, flash head is about 6 inches away from each side window
- 1x Vivitar 2800D @ full power (non adjustable) aimed at top of box, about 8 inches away from window
- All flashes triggered by the new Cactus V5 transceivers (these things are amazing)
- Front lip of background folded forward for fill
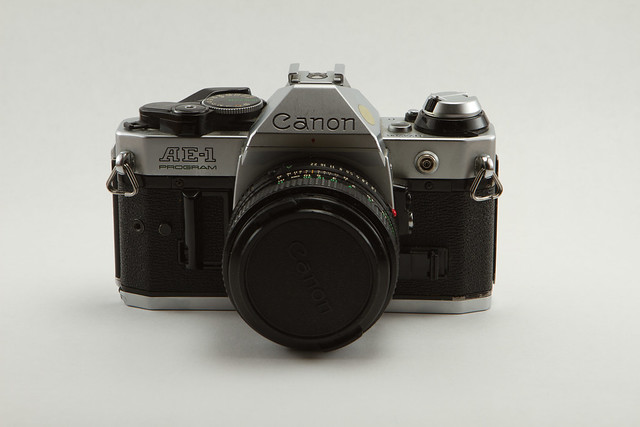
Light-tentted Canon AE-1 Program (1 of 4) — Map
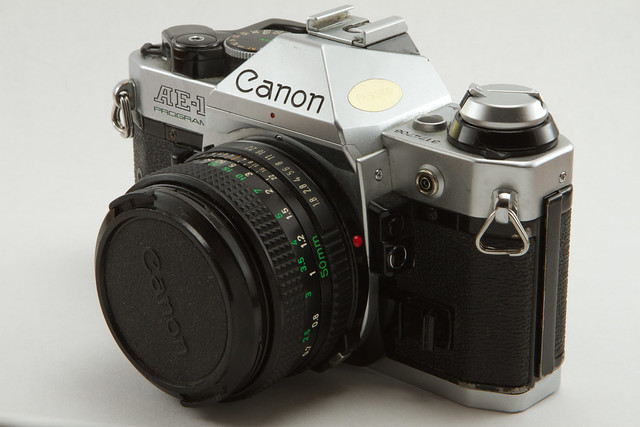
Light-tentted Canon AE-1 Program (2 of 4) — Map
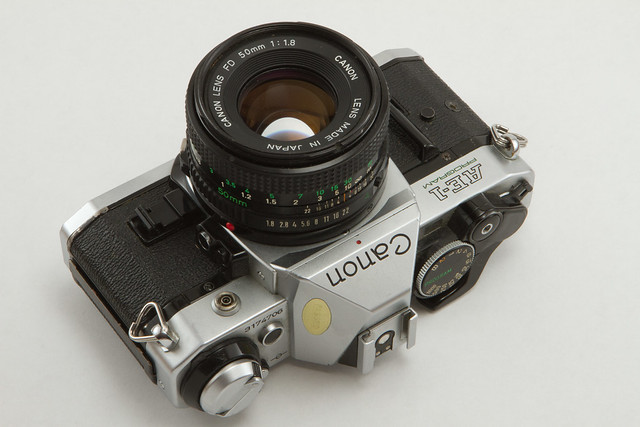
Light-tentted Canon AE-1 Program (3 of 4) — Map
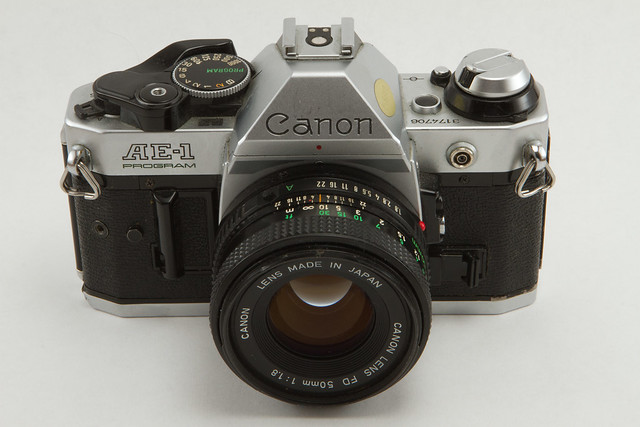
Light-tentted Canon AE-1 Program (4 of 4) — Map

Light-tentted Extremity — Map
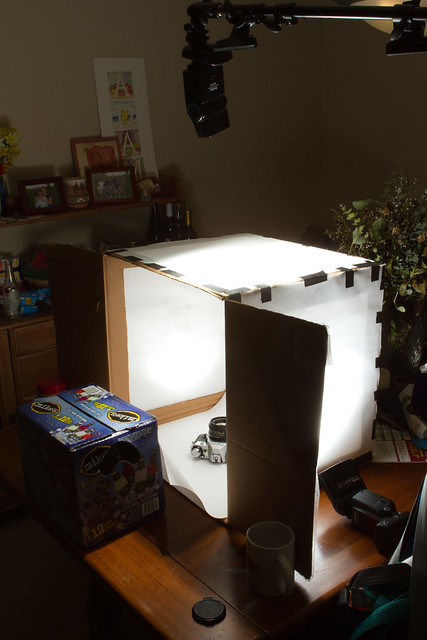
The Setup
As mentioned, here are a couple setup shots to illustrate how easy it is to get soft light like this.
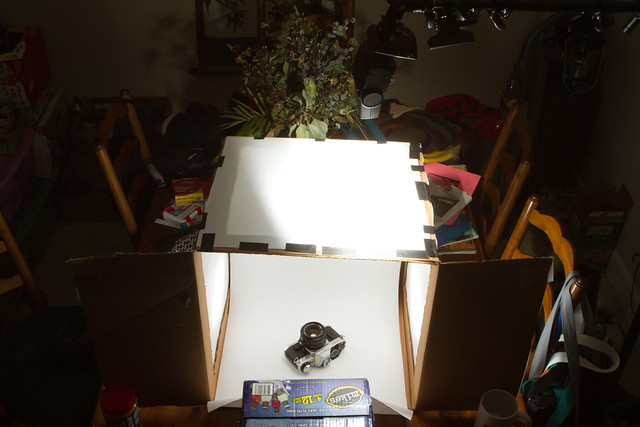
Light Tent Lighting (1 of 2) — Map