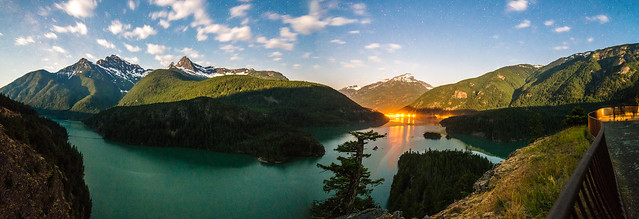
You know you have a good thing going when your fiance encourages you to take photos for two hours while she sleeps in the car…then calls this particular image "one of her all time favorites."  Much better if viewed large on Flickr here.

Shot around midnight on July 8th.  2 image panorama at 14mm (if you can believe it).

Diablo Lake Starscape

{ 0 comments }

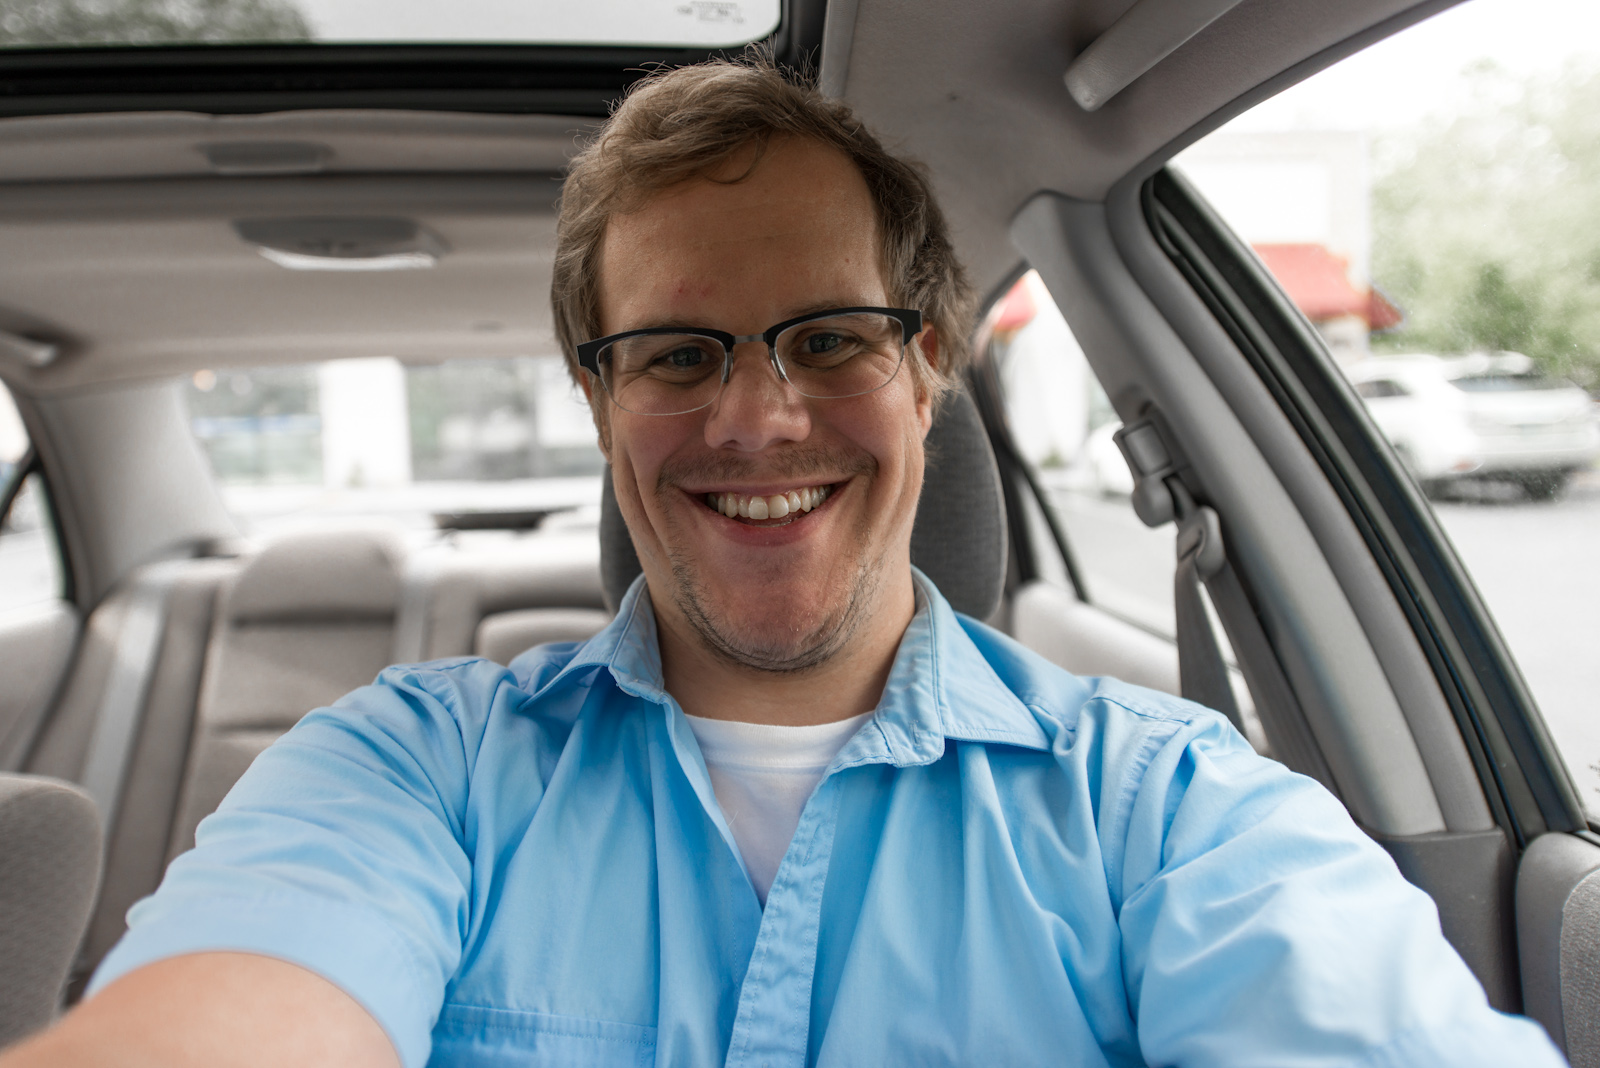
Mouse over to watch the shag disappear!
 
Hair today, gone tomorrow

{ 2 comments }

I've seen people expressing concerns about camera shake while using some of today's high resolution SLRs (at 36 megapixels, the D800 is a prime example).  I've even seen folks use such high resolution as a "negative feature" when comparing to lower resolution cameras, their justification being that somehow higher resolution bodies produce lower quality images when handheld, due to camera shake.

Quite honestly, this is a load of malarkey.  What people are failing to realize is that high resolution cameras are only resolving imperfections in technique which were already there.  There is nothing inherent about a high resolution sensor which means one won't be able to shoot handheld as easily as one would with a lower resolution sensor, it just means that your bad handholding skills will be more apparent because each imperfection will be magnified that much more on a high resolution sensor than on a low resolution sensor.

Of course, since today everyone pixel peeps at 100%, these imperfections are going to stand out, but they do NOT indicate any specific issue with higher resolution cameras that we need to be worried about.  In fact, when downsizing a high resolution file, a photographer will see exactly the same sharpness as if that image were taken with a lower resolution camera in the first place.

Think of it this way: until recently, cameras could not resolve the imperfections that were already there in our technique.  Now that we have such cameras, we have to hold ourselves to higher standards when attempting to make images which will appear tack sharp at 100% resolution.  This means your 1/focal length rule is probably out the window (as it has been for the current breed of 16-20mp bodies for some time now), and you will probably have to adjust your shooting style as a result.

More tripods, more fun.

{ 0 comments }

Whenever new gear is announced, you can be sure the trolls and flamers will come out in force.  One of the best places to see some of the action are the comment threads over on www.dpreview.com.  DPReview is a great site run by great people who try their best to be fair and objective when comparing different makes and models of cameras to one another.  They have been around forever, and are probably one of the best resources on the net for in-depth camera reviews.  Because of this, they get a HUGE amount of traffic.  Which attracts…all types.  Take a gander at some of the comedy gold I mined from JUST 2 THREADS on one of the new cameras announced recently by Canon:
 
 
In response to "Canon 5D3 Low-Light ISO Samples" by DPReview.  Courtesy of echelon2004:
1600 look ok, the rest is just smudge. So, not really à jpg camera?
This is a good example of the most common responses at DPReview: some kind of an overly negative or positive statement which you think makes sense until you realize that you aren't a head trauma patient. 
 
In response to "Canon 5D3 Low-Light ISO Samples" by DPReview.  Courtesy of zsozs:
OMG !!!!! dpreview.com !! You cant take a foto ????
What are you doing ???
Shutter speed !!! Shutter speed !! Look !
No body use the Shutter speed 1/10 in real life !
The test ist not good ,if you use higher shutter speed have much NOISE in low light (1/60,1/100) and its sure iso 3200 much noise you will see !
Can’t tell if troll.  I really, really, can't tell if troll.
 
In response to "Canon 5D3 Low-Light ISO Samples" by DPReview.  Courtesy of VivaLasVegas:
Easily beating D4 at 25600 without even breaking a sweat.
This was said before any high ISO samples for the D4 had even been released.  This guy must have photo gear ESP.  SOMEONE HIRE THIS MAN!
 
In response to "Canon 5D3 Announcement" by DPReview.  Courtesy of vFunct:
Nikon wins.
Time for everyone to sell their Canon gear.
Better luck next time Canon.
This was posted approximately 5 minutes after the announcement was made. It took me about 20 minutes just to read the post he was referring to…lol?
 
In response to "Canon 5D3 Announcement" by DPReview.  Courtesy of canon6188:
This is the PERFECT camera ! Nikon users who consider upgrade to D800 shall weep for another 3 years. Huge upgrade in term of auto focus and ISO plus 6 FPS, who needs 36MP noise ridden, computer busting (huge file size) camera of Nikon …
 
I am getting one soon, give me …….QUICK ….
Ah yes, the classic "MY CAMERA IS SO MUCH BETTER THAN YOURS THAT YOU ARE GOING TO PROBABLY HAVE TO KILL YOURSELF OUT OF SHAME" response.
 
In response to "Canon 5D3 Announcement" by DPReview.  Courtesy of tell the truth:
This is like new paint on an old car. Yawn. This is what the 5d 2 should have been. canon is asleep. Nokia 808 phone BLOWS THERE DOORS OFF !I just dont get it .. A phone camera has more mega pixels than a almost four grand slr!! Sony is going to be around 58 mega pixel,, And NIKON is 36 at 3 grand. What did I miss? This is why canon lost 20 per cent of the pro market last year. Add another 20 per cent loss this year. What a sad day.
TL;DR – phones are now SLRs.
 
In response to "Canon 5D3 Announcement" by DPReview.  Courtesy of Prestidigitator:
So all the Noink fanbois repeating the mantras "12MP is enough" and "High ISO is more important than megapixels" since 2007 are now changing their tune? LOL. As if these fanbois even print their pictures to huge sizes that they require 36MP.
Noink? Fanboi? What are you, 5?
 
In response to "Canon 5D3 Announcement" by DPReview.  Courtesy of METROMODEPHOTO:
well"well" "well", 5D MARK-3 AT 22MP AND D800 AT 36MP THEN BOTH FOR AROUND 3.300 {WHATS-UP-WITH-"THAT"} CANON? I WOULD THINK THAT THE 5D MARK -3 WOULD HAVE MORE MP FOR THE MONEY", AT LEAST WITH 45MP GIVING YOU THE OPTION TO GO DOWN TO 22MP WOULD BE NICE.I LIKE TO UPGRADE TO A SECOND BODY FROM MY 7D AND HAVE A FULL SIZE SENSOR SLR FOR ONCE. IT LOOKS LIKE NIKON ANSWERED THE "Q" FOR ME. NO PLAN ON SWITCHING AT ALL BUT, IT WOULD BE NICE IF YOUR GOING TO UPGRADE THE 5D MARK-2 TO A "3", THEN DO IT IN EVERY WAY I WOULD THINK". MABY THERE IS A "5D-X" WHO KNOWS, I GUES WE WILL SEE IN DO TIME"
"OH", DID I MENTIONED THAT THE NEW 24-70 2.8 USM L HAS A WHOPPING 82MM FILTER LENS TREAD ,"YES THAT RIGT" IF YOU WANT A UV OR A CLR POLARIZER , YOUR GOING TO HAVE TO PAY THE BIG BUCS TO GO FROM 77MM TO 82MM FOR THE "SAME FOCAL RANGES ON YOUR 2.8 24-70 USM L PREVIOUS MODEL , NOT GOOD NEWS AT ALL!!!
————————————
OH, YEAH" I WOULD LIKE TO UPGRADE FROM MY AWSOME 7D APS SENSOR TO A FULL SIZE SENSOR SOME DAY AND END THE GET THE LATEST AND THE NEWEST "RAT-RACE" SOME DAY BUT, I AM WELL DISAPPOINTED WITH THE RIDICULOUS "ONE" MORE MP 21MP 5D-2 TO A 22MP 5D-3 UPGRADE. YES,IT DOES MAKE A DIFFERENCE SINCE NIKON OFFERED 36MP WITH THE NICE OPTION OF GOING DOWN TO 22MP FOR EXTRA FINE DETAIL AND SOME DAY IF YOU LIKE TO BLOW UP LARGE PHOTOS AND GET THE EXTRA DETAILS WELL ITS ALL THERE AND READILY AVAILABLE. ITS JUST LIKE HAVING AN SLR THAT SHOOTS HD VIDEO.I DO NOT DO VIDEO YET BUT AS I SAID BEFORE, IT IS NICE TO HAVE THE OPTION TO. "YES, OPTIONS ARE GOOD.
————————————
IN MY CONCLUSION, IS IT WORH UPGRADING FROM A 7D OR A 5D-2 TO A 5D-3? CONSIDERING THE MEANING OF "UPGRADE", THE D800 WOULD TRULY FIT THAT DESCRIPTION. I WILL NOT MAKE A SWITCHOVER AT THIS TIME BUT, WHO KNOWS THE FUTURE". FOR ME ITS ABOUT ENDING THE NEVER ENDING RAT-RACE FOR THE LATEST AND THE NEWEST SOME DAY. I GUES WE ALL DO IT ONCE OR TWICE IN A LIFETIME. AND YES BOTH CAMERAS ARE VERY VERY GOOD IN THEIR WAYS FOR SURE. HOWEVER, NIKON IS GIVING YOU YOUR MONEYS WORTH IN THIS CATEGORY. CANON IS MY CHOICE FOR NOW, BUT THEY NEED TO SMELL THE COFFEE FAST.
This one is actually 3 separate comments, made approximately 5 minutes after one another.  It's like someone taught a 6 year old enough English to form words, but not enough to make ANY DAMN SENSE.
 
In response to "Canon 5D3 Announcement" by DPReview.  Courtesy of Cliff Watson:
Canon, really? This is the best you can do? Is there a real "new" camera coming like a 3D or a 9D that will keep serious photographers in the fold?
Because people weren’t making beautiful images with 6MP cameras from 10 years ago.  Ansel Adams is spinning is his fucking grave.

In response to "Canon 5D3 Announcement" by DPReview.  Courtesy of GabrielZ:
What! 22 MP only!How's that going to compete with Nikon's D800? I know 36MP might be overkill for the monent considering the resolving power of current lenses. Still disappointing though. The 5D Mark II had nearly twice the resolution of the 5D, so I was at least expecting a 50% increase for the Mark III. Is this Canon admitting it's lenses aren't good enough resolution wise?
Let's break this down logically.  A > B because B has more C than A.  But C doesn't matter.  But A still > B.  Trust me on this one, guys.
 
In response to "Canon 5D3 Announcement" by DPReview.  Courtesy of Francis Carver:
On to the specs of this "new" EOS 5D wonder…..
 
"It can shoot 6 frames per second"
 
Wow, only 6 fps? In the year 2012? That's nothing to write home about, is it now? Re. video, it can shoot 1080p at 24, 25, and 30 frames per second. But so could the previous Canon EOS 5D that came out 3.5 years ago, right? The new 5D cannot even do 1080p60 video — another fatal mishap. Nor will the new 5D be able to put out uncompressed HDMI, like the Nikons will be able to do, wow!!! All you can do with the new EOS 5D is what you could with the old one — record video only internally, not externally.
 
For external recording capabilities with a connected video field recorder at superior bitrates, you will need to go with the NIKON D800 or NIKON D4, correct? Giant advantage: NIKON.
 
Mono audio recording only — yeah, right. I would have thought that SOMEONE at Canon must have heard of the word "stereo" by now, huh? But at least they give you a headphone jack, like the Nikons do.
————————————
"The EOS 5D Mark III features a new Creative Photo button, which enables users to quickly select Picture Styles."
 
Wow, so for $3,500, this Canon camera will give you capabilities that every $200 and up point-and-shoot pocketable camera now has — Picture Styles. Wow…. Veddy professional, indeed.
 
According to DP Review, the price will be $3,500 for the body alone. On the Canon web site, there is NO PRICE for this camera. And there is also NO PRICE still for the EOS 1D X that Canon had announced exactly four months ago! Maybe they are giving that one away for free, who really knows?
 
Considering that the $3,000 NIKON D800 dwarfs this new Canon EOS 5D in most technological aspects, not to mention that it looks much better, good luck to Canon for selling these "new" 5D bodies at $3,500 a pop…. or even close to it.
 
Only hard-core Canon fiends need to apply here, I suspect. :-((
This is one of those posts that seems to make a point…until you realize that the OP is actually full of shit.  1) Both the D800 and 5D3 can shoot at 6FPS.  2) No Canon or Nikon on the market can do 1080×60.  EDIT: As was pointed out in the comments, numerous Sonys can do 1080×60.  3) Both the D800 and 5D3 record mono audio without an external mic.  4) He bashes on picture styles when that is how any serious videographer controls things like contrast, saturation, and sharpness (and is something that has been in every Canon body for the last half a decade).


And now on to some of the good responses.  You know, the ones which restore your faith in humanity

In response to "Canon 5D3 Announcement" by DPReview.  Courtesy of d smith:
Awesome, I love how folks are always ready to abandon ship at announcements. Go ahead and dump your gear, just let me know where I can get your stuff for a used price while you switch sides to buy new again, only to repeat at the next announcement! haha The gear by these companies surpass the knowledge and effort most fanboys will ever practice anyway. Go back to film bitches
The classic "oh, you're quitting WoW?  Can I have your gold ploz?" response.  It's so true, though.
 
In response to "Canon 5D3 Announcement" by DPReview.  Courtesy of Mulder_:
I am reading a lot of forums about totally different topics, why is it that photographers are the worst people i come across in the internet. Canon/Nikon owners are worse fanboys than Apple owners… jeeeez, get a grip, let people have their opinions, discuss the camera and stop the hating, it is embarrassing!
He's right – the amount of vitrol that spews forth during these camera announcement times is on the same level as the GOP primary.  Or Thanksgiving dinner at Aunt Bessie's house.
 
In response to "Canon 5D3 Announcement" by DPReview.  Courtesy of backayonder:
British Grand Prix, Brands Hatch 1982.
 
I saw something that has always stayed in my mind when it comes to photography and gear.
 
I couldn't help but notice the working Professional photographers going about their work.They had battered cameras and lenses held together with gaffer tape attached to monopods. Their photo's graced the newspapers on Monday and no doubt the glossy racing magazines later.
 
Waiting for the race to begin I noticed a keen amateur photographer in front of me. He had a pristine aluminium case. He eventually opened it to reveal a shiny Canon A1 and numerous lenses. They were immaculate. The foam protecting his gear was so sharply cut it could draw blood.
 
The crowd around him, bored, looked on.
 
But oh no what is this? A piece of grass had blown onto the foam! Manicured fingers quickly moved in to remove the errant grass and brushed away any dirt. Wow what a lucky escape.
 
The crowd around him watched on in amazement at this total plonker.
 
A camera is just a tool.
I love this.  I love it so much.  Thanks, mystery denizen of the internet.


Anyway, for those of you who aren't batshit insane, I hope you are as excited as I am for the new offerings from Canon, Nikon, and other companies.  Every year the bar is raised, my only  hope is that my skills can improve in proportion to the technology.

{ 6 comments }

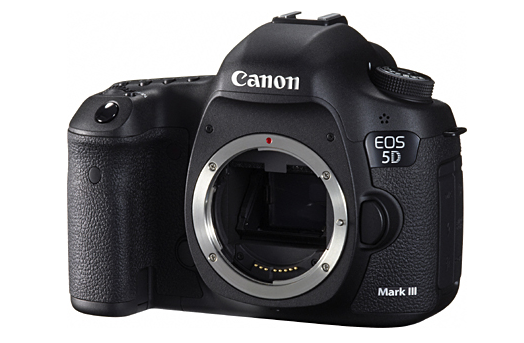
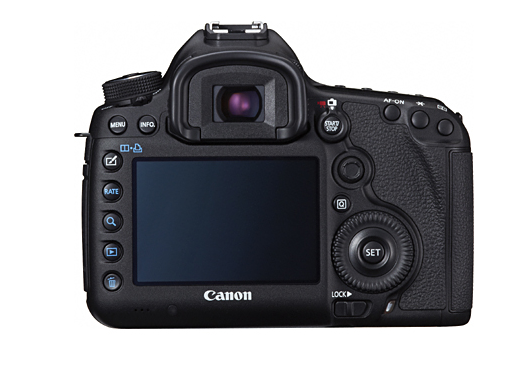
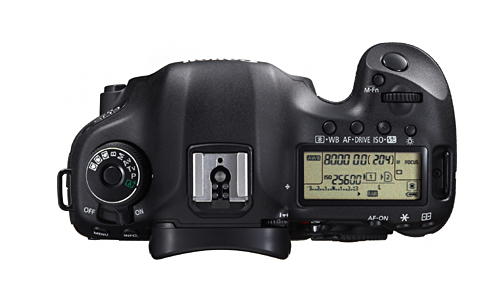
As always, the rumor mill has been going for a while on this one.  One of my favorite sources is Canon Rumors, so here's the rumored spec list from earlier today: http://www.canonrumors.com/2012/03/5d-mark-iii-full-spec-list.  Images below are (c) Canon Rumors.

Notable specs include:

  • 22.3 Megapixel Full Frame CMOS sensor
  • ISO 100-25600 (expandable to L:50 H1:51200, H2: 102400
  • 61-point high-density reticular AF (up to 41 crosstype points)
  • 6.0 fps
  • Full HD Movie (ISO 100-12800 (H:25600)
  • Dual card slots (CF & SD)
  • Multiple Exposures
  • High Dynamic Range (HDR) Mode
  • iFCL metering with 63-zone dual-layer sensor
  • Shutter durability of 150,000 cycles

I've heard the range of opinions on this spec list.  Plenty of people are excited (me being one of them), with the expected few who whine about needing 39 FPS at 382 megapixels at a 1,500 dollar price point.  I've thought all along that if they threw a full frame sensor into a body with 7D ergonomics and AF, I'd buy one in a heartbeat.  Canon seems to have heard my brainwaves, because that is exactly what they've done.  For those who say the 5D Mark III isn't an interesting upgrade, I'd counter with the following list of improvements which I believe will make a huge difference in handling and usability for this particular camera:

  1. Better ergo BY FAR.  For those of you who have used the 7D and 5D II, I’m sure you’d agree that the 7D is better in every department as far as ergonomics are concerned.  Compared to the 5D II, the 5D III has:

    • M.fn button.
    • Properly placed DOF preview button.
    • The wonderful sculpted thumb grip of the 7D on the back of the cam.
    • The wonderful LV / Movie start/stop button.
    • Properly sized buttons that actually feel good when you press them (AND CAN BE USED WITH GLOVES).
    • A proper wheel lock dial separated from the ON/OFF switch.
    • A proper ON/OFF switch.
    • Locking mode dial (I hate this on both the 7D and 5D II)
    • (Assuming) Beautiful 7D-esque view finder
    • +/-3 EV display on top LCD vs. +/- 2 on the 5D II
    • Additional buttons (Q button, RATE button, whatever the button is above RATE) – assuming at least some of these can be re-mapped.
  2. +2 stops native ISO – remember when cameras would release with maybe 1 stop tacked on to native ISO?  How can people not be excited for this?  (Yes, hold your breath for samples, etc, but do you really think Canon will screw the pooch here?)
  3. AN ACTUAL AF SYSTEM – seriously, need I say more?  Remember when people were pining for 7D AF in the 5D II?  If this is at least as good, I am very pleased.
  4. 50% increase in FPS at a higher resolution than the 5D II (6 vs 4).  Is it 8?  No, but it’s fast enough to actually make me consider using this for action photography.
  5. Headphone jack for those video folks out there.
  6. Dual card slots…this is huge – and if you have an Eye-FI, you can actually USE IT with this camera.
  7. "Improved” weather sealing.  I’m assuming this is at 7D level, in which case, I am confident in shooting in rainy conditions without issue.
I'm happy to see Canon moving away from the "shit af + great sensor" model that they've been following for the last half a decade.  Nikon got it right when they threw their pro AF module in their semi-pro bodies, and I am excited to see Canon follow suit.

Now, I will make one prediction for those folks who never really seem satisfied with their current gear.  Remember back when the D700 and 5D Mark II were announced?  Remember how the Canon guys all wanted better ISO perf and the Nikon guys all wanted more resolution?  Remember the religious wars that were spawned as a result?  Guess what?  The tables are turned, and now we are ALREADY seeing people from both camps bitching about the exact opposite issues that they were 3 years ago.  Funny how that works, eh?  I guess the grass is always greener on the other side :).

Happy shooting.

{ 0 comments }

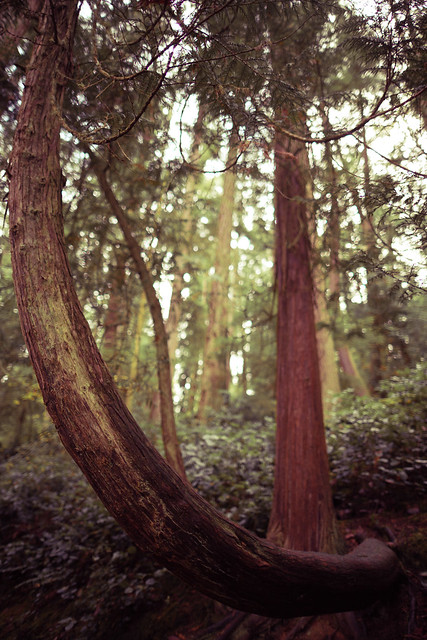
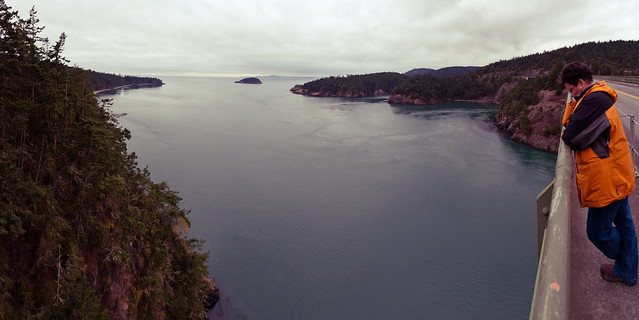
I haven't been on a walk for a while.  I guess it's been too easy to stay inside these days, what with 2 week long vacations and lots of books to read.  I need to go on more walks, I guess, so here are some photos of one my Mom and I went on back in October.

Tree, Deception Pass

Wet Ferns

Long Dead

Mom, Looking Over the Pass

Best of 2012 to all of you.

{ 0 comments }

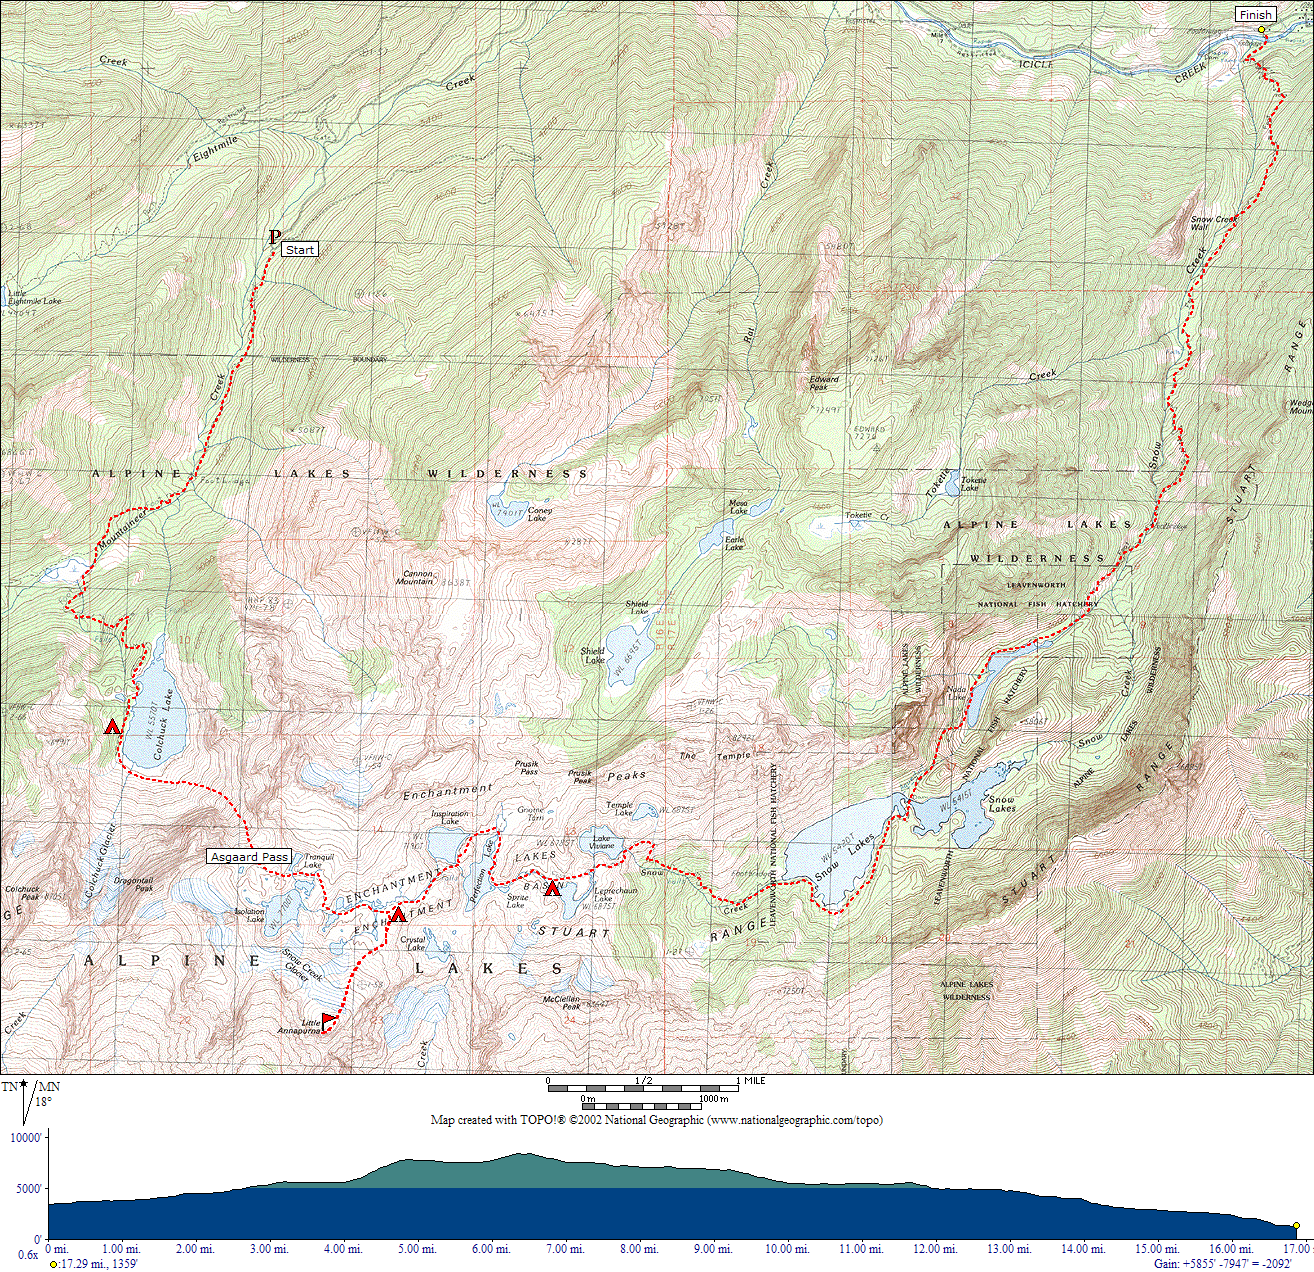
…until I go on my backpacking trip to the Enchantments!  The National Park Service limits human traffic into the area via an annual lottery system, but I was lucky enough to get a spot with a group of Microsoft photographers who were going this October.  I've been waiting for half a year or so, and I'm kind of not really believing the time has arrived?  Why am I so excited?  Well, the core Enchantments zone is probably one of the most beautiful places in Washington state, if not the country.  It's a photographer's paradise, because you get half a dozen lakes, huge ridges, awesome boulder fields, neat-looking trees, and strange mossy growths all within an area smaller than 10 square miles.  It's also home to mountain goats who will lick anything you pee on for want of salt.

It's not a long hike (about 20 miles total if you don't count the walking around for photos), but the first day is a bitch:

  • Day 1: Stuart / Colchuck Trailhead -> Tranquil Lake
    • Trailhead -> Colchuck Lake = 4.2 miles with 2200 feet elevation gain
    • Colchuck Lake -> Asgard Pass = 1.1 miles flat
    • Asgard Pass -> Tranquil Lake = 1.2 miles with 2300 feet elevation gain (bouldering + scree!)
  • Day 2, 3, 4: Photography in the Core Enchantment Zone
  • Day 5: Core Zone -> Snow Lakes Trailhead

Here's a map of the route (courtesy of www.niffgurd.com):

Fun fact, one of the Windows 7 desktops was taken in the Enchantments by a photographer working at Microsoft.  Who knows, maybe I'll get lucky and have something ship with Windows 8 (haha, yeah right)

Happy shooting!

{ 0 comments }

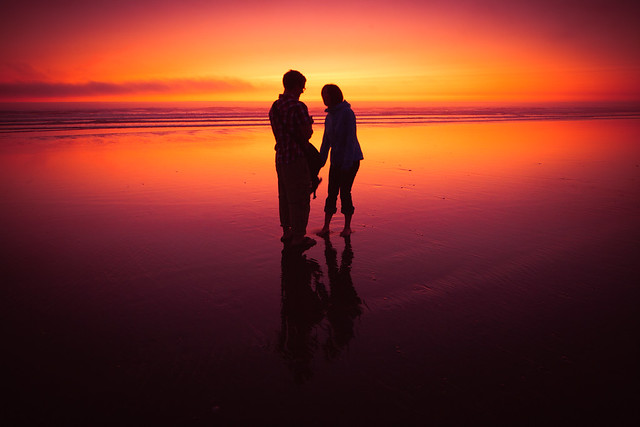
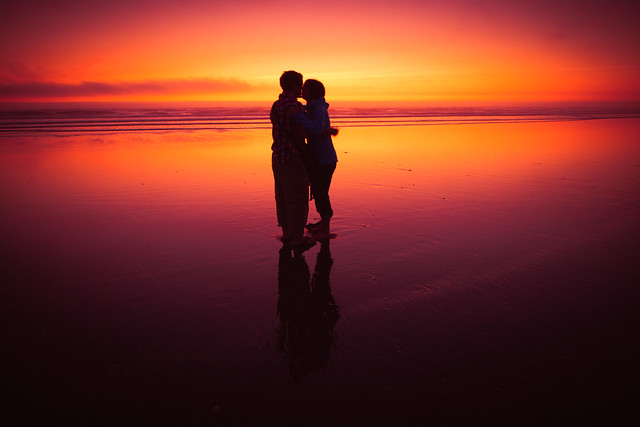
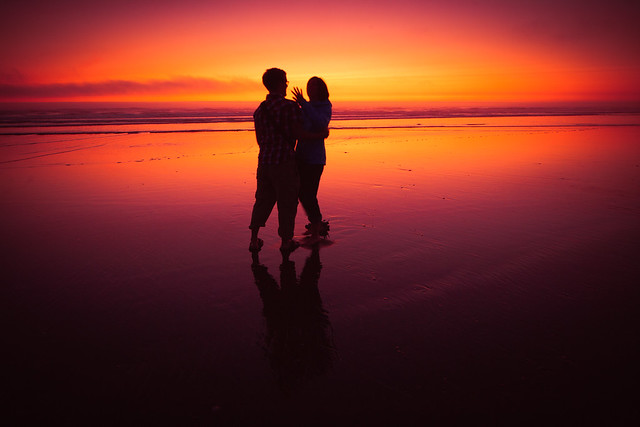
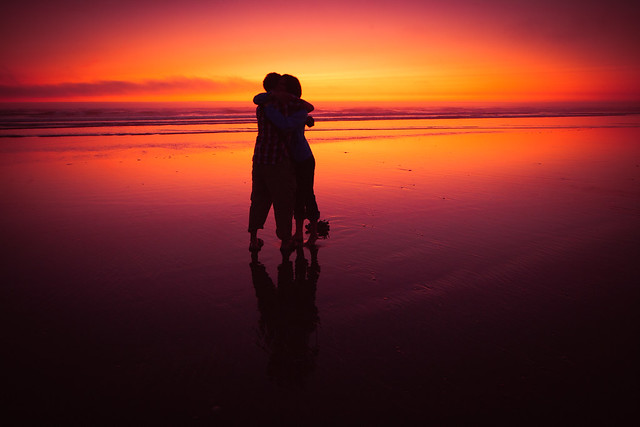
I proposed to Haley on an Oregon coast as the sun was setting and the fog rolling in, all while my camera was clicking away dutifully.  So happy to be with the one I love :).


The Proposal (1 of 4)


The Proposal (2 of 4)


The Proposal (3 of 4)


The Proposal (4 of 4)

{ 8 comments }

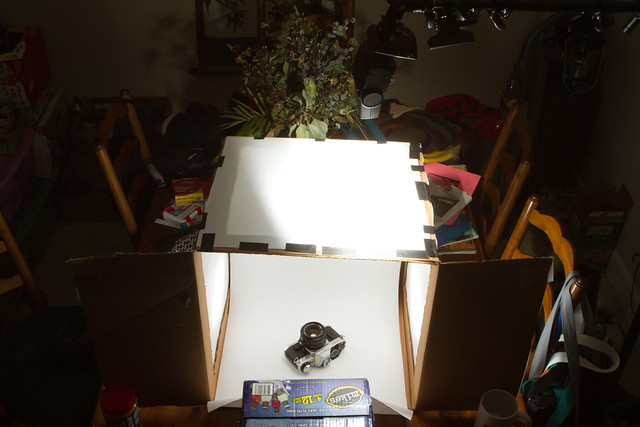
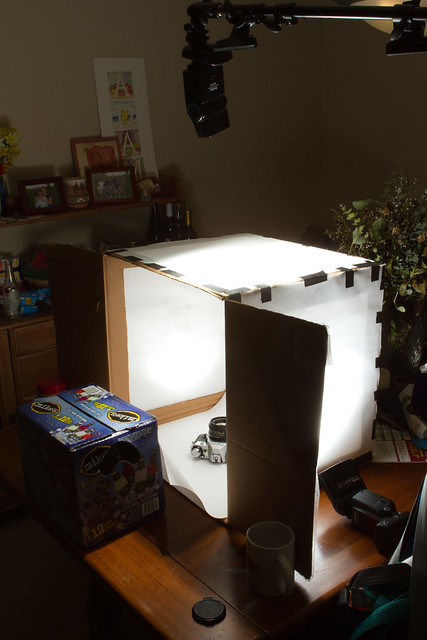
Inspiration time!  Thanks to FlashBus and the associated flurry of Googling (and subsequent money spent on off-camera flash gear), I decided to take a stab at making a light tent.

Before I begin, you should start this project by asking yourself what you want to be able to do with your light tent.  Are you just going to photograph small items (jewelry, etc?)  A big box like this may be overkill.   I opted for a rather larger variety, as I knew I wanted to be able to take pictures of larger items.  Do you want more flexibility in hard / soft light?  This may not be for you, as you're going to get very soft light out of this almost no matter what you do.  My goals were just to do some basic product photography for all those times I sell things on POTN, so my requirements were pretty lax.  Yours may not be, so keep that in mind before starting.

Another thing to keep in mind is that this is just a recipe, not some proscriptive set of instructions.  For example:

  • I chose to make 3 windows, and leave the back of the box intact, maybe you want to put a light behind your background, in which case you'll want to remove the back of the box, as well.
  • Maybe you don't want to use paper for your window material, for fragility / light diffusion reasons.
  • Maybe you want something more robust and not made out of what is effectively tree-pulp :).

That said, I'll show you how to make a pretty simple version which will get you stupidly good light for less than 10 dollars.

Full Flickr set can be found here.

What you'll need…

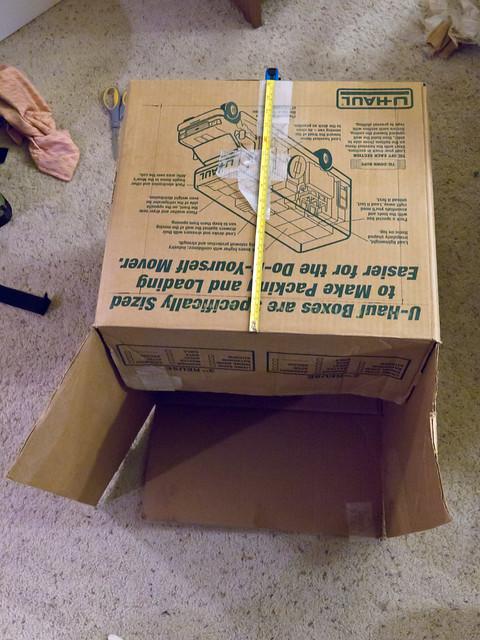
  • 1x Cardboard box of sufficient size (the one I chose was 16"x18"x18")
  • White Banner Paper
  • Gaffer's Tape
  • Thin Sharpie or Pen
  • Scissors
  • Knife / Box Cutter

Step 1: Measure your window opening

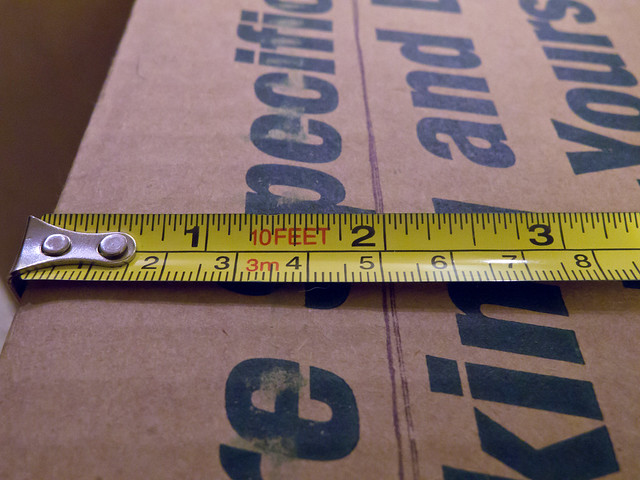
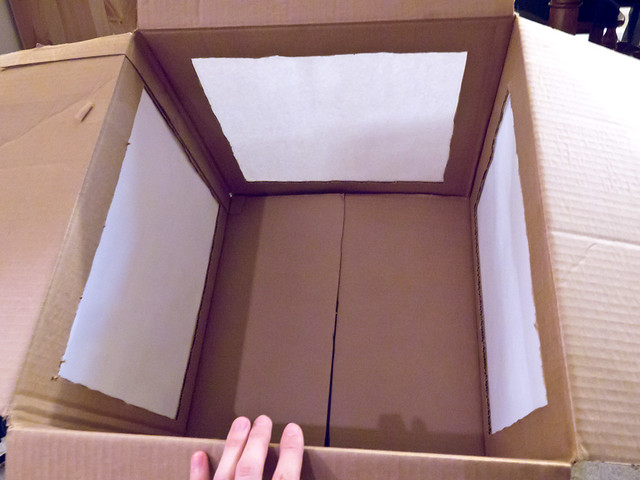
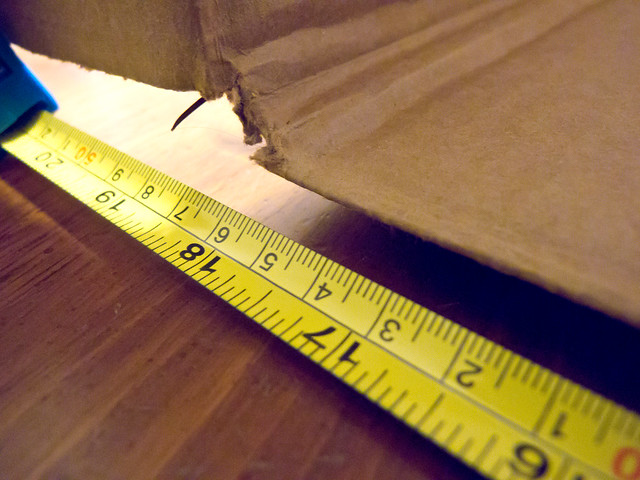
You are going to begin by measuring windows on 3 of the sides of the box.  Each of these windows should leave 2 inches on each side to allow you to attach your diffusion material and to give some structural integrity to the final product.

DIY Light Tent Build (1 of 8)


DIY Light Tent Build (2 of 8)

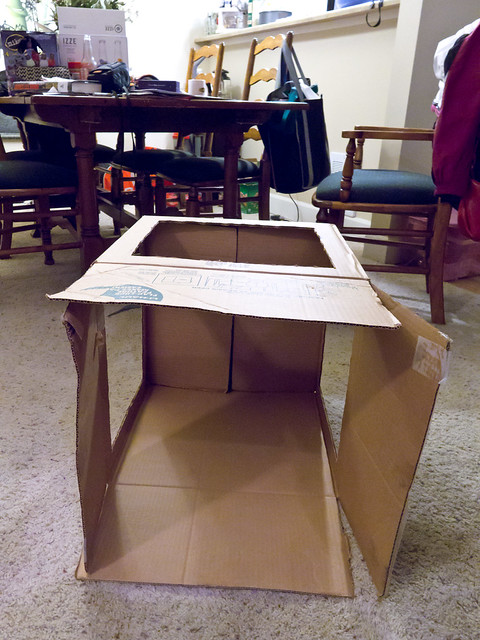
Step 2: Cut out window openings

Next, cut the window openings out with a sharp knife or box cutter.  I recommend using a box cutter if you have it.  Scissors will leave really bad lines and could damage the cardboard.  I actually used a kitchen knife, but I do NOT RECOMMEND THIS.  I am not the safest individual.  Your box should look something like the below.

DIY Light Tent Build (4 of 8)

Step 3: Attach window diffusion material

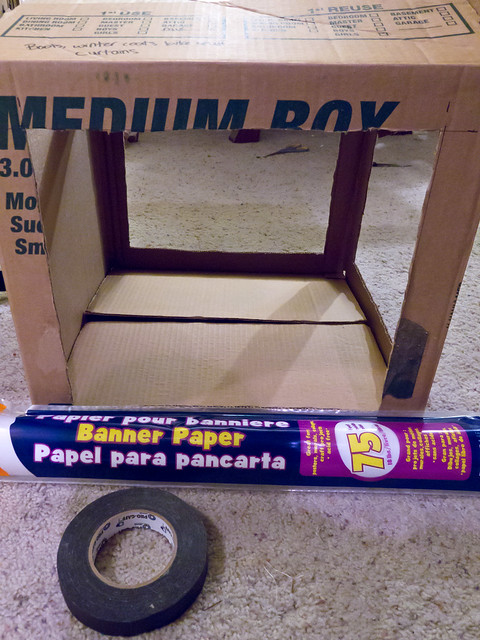
Next,  you're going to want to cut out squares of diffusion material that are slightly larger than the size of one side of your box.  In my case, I cut a 20 inch piece of my banner paper, taped it along two edges of the window opening, and cut off the excess. 

Do make sure that you leave enough space alongside the window borders to attach your diffusion material (I chose about an inch).  This is also why 2 inches of border is a good choice, as it gives you some working space.

DIY Light Tent Build (3 of 8)

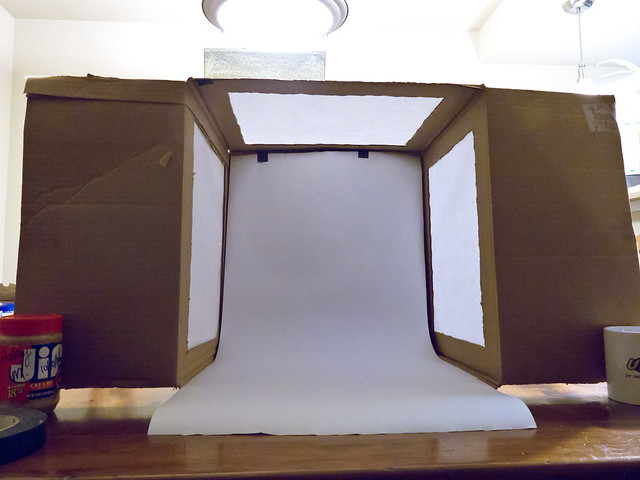
Your finished light tent should look something like the below.  Notice that I have left the front and rear box flaps on.  This will be important for a couple of reasons later on.

DIY Light Tent Build (5 of 8)

Step 4: Measure and cut seamless background.

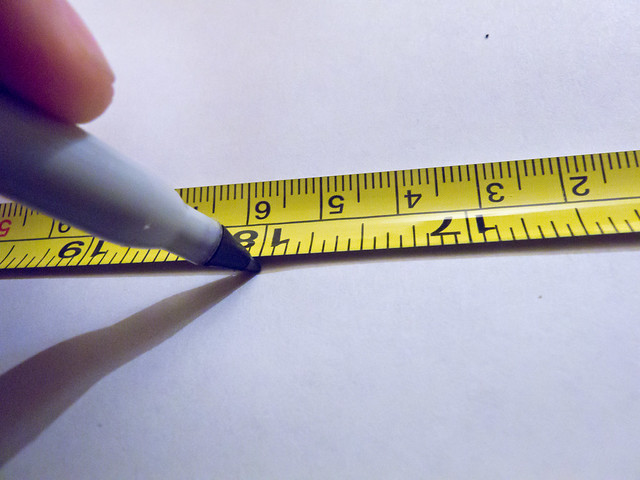
Your final step is to pick a background material, and cut it (if necessary) to fit the inside of your box.  I chose to use banner paper again because it can be folded easily in the box and can be taped up to the top inner edge without issue.  Card stock would work well, too.  One note: make sure that you leave 6-12 inches of background coming out of the front of your light tent.  This will let you fold the background forward to act as a reflector.

DIY Light Tent Build (6 of 8)

I actually cut at about 17.5 inches, to leave a bit of room on the edges of the inside of the box so the paper wouldn't get bunched up.

DIY Light Tent Build (7 of 8)


Step 5: Add background to light tent, enjoy!

Once you add your background to your new light tent, you are done!  Start to take some shots and be impressed by how brain-dead easy it is to get soft light.  A couple of notes before I show some example images.

  • Leave the inside box flaps – this will allow you to hang your background easily (as you can see in the image below).
  • Leave the side box flaps on in the front – this will allow you to flag your flashes if you have back them away from the side.  It also allows you to protect the inside background when you aren't using your light tent.
  • Leave the bottom box flap on in the front – this will allow you to prop up the extra background you left in step 4 for use as a reflector
  • Cut off the top front box flap – this serves no purpose and will just get in your way

DIY Light Tent Build (8 of 8)

Example Photos

Here are the first few shots I took with this light tent.  They are all straight out of camera with zero editing, to give you a sense of what this setup is capable of.  Tech details are below:

  • 2x 580 EX II @ 1/8th power, Zoomed to 24MM angled up on the left + right sides of the box, flash head is about 6 inches away from each side window
  • 1x Vivitar 2800D @ full power (non adjustable) aimed at top of box, about 8 inches away from window
  • All flashes triggered by the new Cactus V5 transceivers (these things are amazing)
  • Front lip of background folded forward for fill

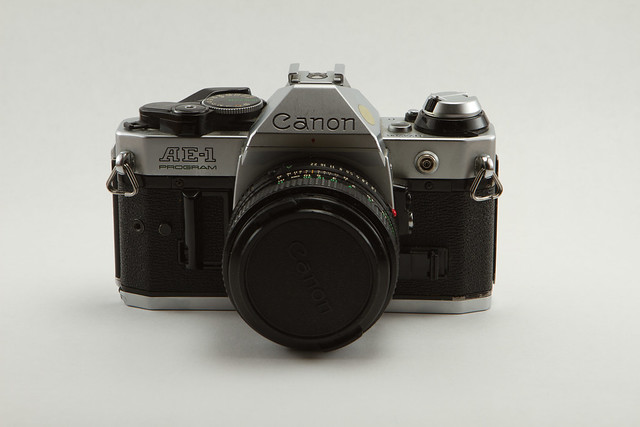
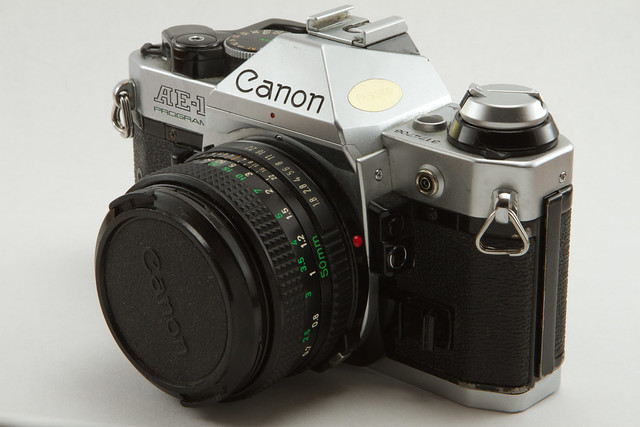
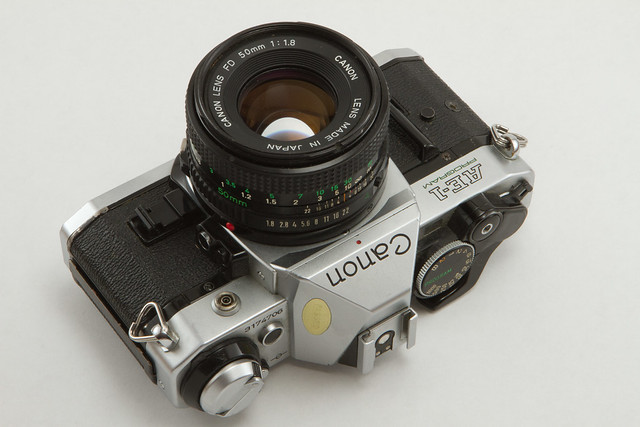
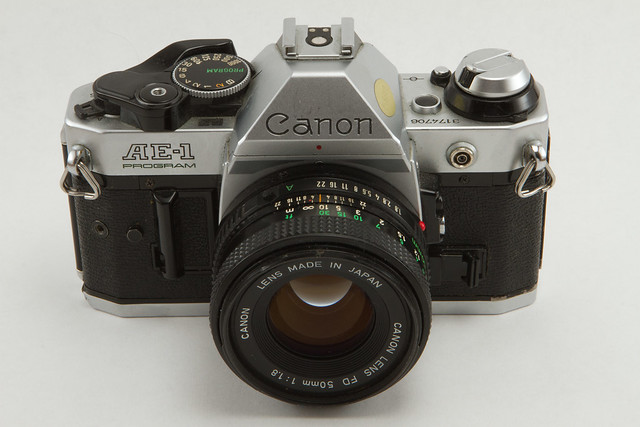
Light-tentted Canon AE-1 Program (1 of 4)

Light-tentted Canon AE-1 Program (2 of 4)

Light-tentted Canon AE-1 Program (3 of 4)

Light-tentted Canon AE-1 Program (4 of 4)

Light-tentted Extremity

The Setup

As mentioned, here are a couple setup shots to illustrate how easy it is to get soft light like this.

Light Tent Lighting (1 of 2)

Light Tent Lighting (2 of 2)

{ 0 comments }

I had a bit of a happy thing happen which probably isn't that interesting, but I want to talk about nonetheless.

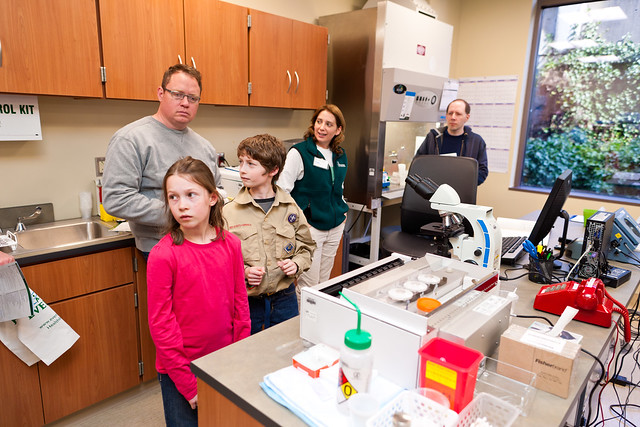
On Saturday I went to see Haley's new workplace's open house (a hospital in downtown Redmond) and took my camera along to take some shots.  I had presumed it would be crappy indoor lighting, so I took my 24/1.4 ii.  I also presumed it would be close quarters, so I paired it with my full frame camera.  Finally, I tossed my flash in my bag because I could, although I kind of just wanted to shoot fast with the prime and not worry about flash.  Well, I'm glad I had it with me because things would have sucked without it.

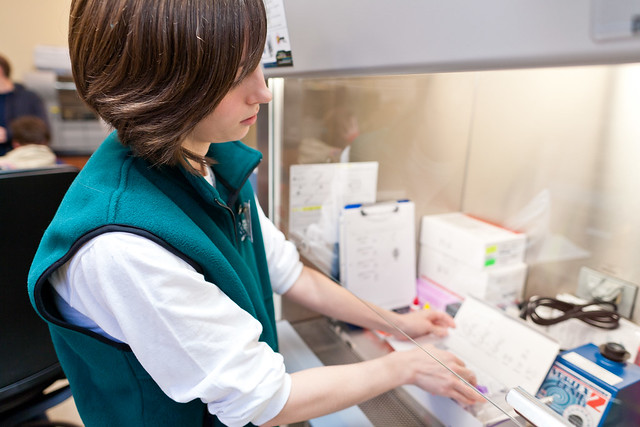
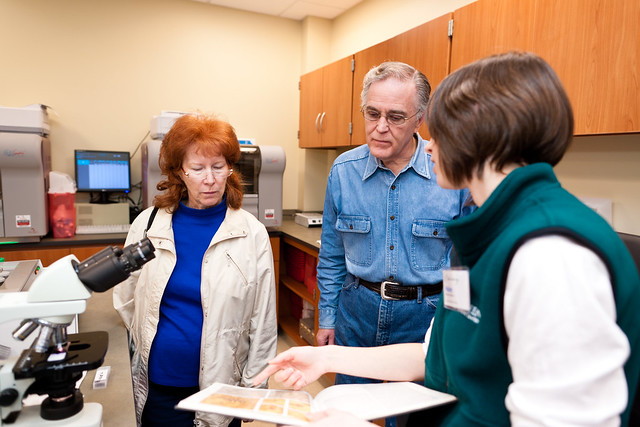
Since I was only going to be there for a half hour or so (I had a Starcraft match watching party to attend), I decided just to shoot around the room in which Haley works, the hospital's laboratory.  The lab is basically like a giant chemistry classroom filled with millions of dollars of equipment that do very specific things.  It had big windows, but they were only getting diffuse light off of a big, ivy covered, concrete wall half a dozen feet from the window.  Most of the light was coming from these strangely colored fluorescent lights overhead, with just enough cool ambient lighting to be annoying.  I took a few shots without flash using the fluorescent setting on my camera and was not happy…everything was a muddy greenish brown.  I shot a piece of paper for custom WB, tried again, and things looked better, but everything was muddy…mostly due to the lack of fill light.

I grudgingly got out my flash and thought about what to do next.  Normally when I'm in mixed lighting (diffuse daylight + fluorescent especially), I kind of give up.  The reason being that the standard plusgreen gel is just too green for the daylight, and bare flash is just too cool for the ceiling lighting.  In this case, since my first shot turned a strange green + brown, I knew that these weren't regular fluorescent lights, but probably some of the newer, energy-saving, variety that attempt to give off a more incandescent flavor of light.  Fortunately, I always tape the following gels (from a Rosco sample pack) to my flash head with gaffer's tape:

  • Full CTO
  • Half CTO
  • Quarter CTO
  • Quarter Plusgreen
  • Half Plusgreen

Based on a wild ass guess, I took off a quarter CTO and a quarter Plusgreen and put them over the flash head and took a ceiling bounce flash shot using the custom WB I had already dialed in, using full TTL goodness and Aperture Priority with no compensation.  The result was that I was getting shutter speeds around 1/60th – 1/125th at 2.8 at ISO 200, and the bounce flash was adding just enough fill and balance to remove the muddiness I had been getting earlier.  Bam, almost perfect lighting with zero effort, and consistent enough that I could just walk around the room, varying flash head angle + fill card usage occasionally, but really just only having to think about composition and getting the focus spot on at 2.8.

Really happy I had my flash on my camera for this scenario.  Really happy I'm learning more about on (and off) camera flash.  I've got some lighting equipment coming this next week, so hopefully I'll get a chance to get more complicated very quickly.

I blame it all on Flash Bus.


Evergreen Entrance

Canon EOS-1Ds Mark II Aperture-priority AE @ 0 EC 24.0 mm 24.0 mm 1/400 sec f/8.0 ISO 100 Redmond, Washington
Evergreen EntranceMap
Evergreen Hospital (Haley's new workplace) just opened a new location in Redmond. I went to their open house to see Haley and take some pics.


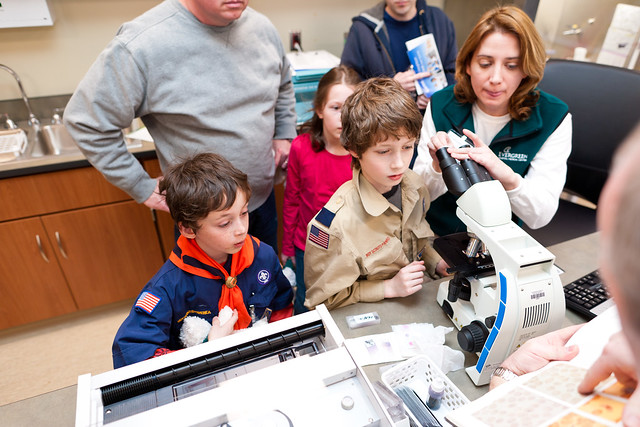
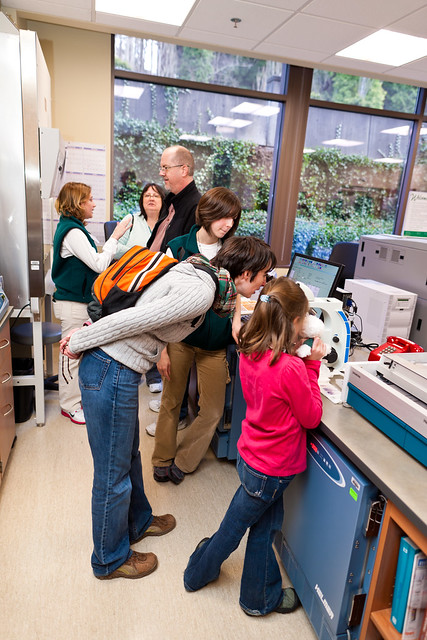
Kids at the Microscope


Preparing the Microscope


Curious

Canon EOS-1Ds Mark II Aperture-priority AE @ 0 EC 24.0 mm 24.0 mm 1/80 sec f/2.8 ISO 200 Redmond, Washington
CuriousMap
Boy scout on the left was much more curious than his brown-coated companion.


Haley at the Hood


Finally

Canon EOS-1Ds Mark II Aperture-priority AE @ 0 EC 24.0 mm 24.0 mm 1/60 sec f/2.8 ISO 200 Redmond, Washington
FinallyMap
Boy scout waited patiently to get to the microscope, then went to town. His dad asked Haley about how much a scope like that would cost to get for his kids :).


More Malaria discussions


Haley at the Scope (1 of 3)

Canon EOS-1Ds Mark II Aperture-priority AE @ 0 EC 24.0 mm 24.0 mm 1/50 sec f/2.8 ISO 200 Redmond, Washington
Haley at the Scope (1 of 3)Map
Her: "This is a gram positive bacteria, and this is a gram negative bacteria." Me: "Wat"


Haley at the Scope (2 of 3)

Canon EOS-1Ds Mark II Aperture-priority AE @ 0 EC 24.0 mm 24.0 mm 1/60 sec f/2.8 ISO 200 Redmond, Washington
Haley at the Scope (2 of 3)Map
I did know a bit about blood clotting, which impressed the coagulation machine rep.


Haley at the Scope (3 of 3)


Mother and Child taking a look


Focussing again...

Canon EOS-1Ds Mark II Aperture-priority AE @ 0 EC 24.0 mm 24.0 mm 1/60 sec f/2.8 ISO 200 Redmond, Washington
Focussing again…Map
The scope is pretty finicky when randoms come to take a peek. Haley had to adjust often.


Neat!


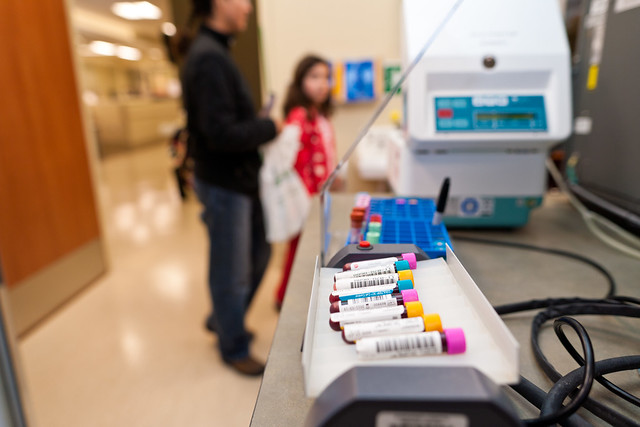
Blood


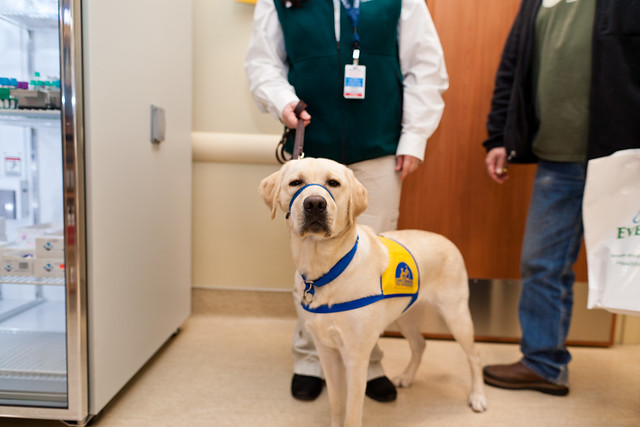
Seeing Eye Dog

Canon EOS-1Ds Mark II Aperture-priority AE @ 0 EC 24.0 mm 24.0 mm 1/80 sec f/2.8 ISO 200 Redmond, Washington
Seeing Eye DogMap
Very interested in the blood getting mixed from the previous shot :).


Laboratory Technicians

Canon EOS-1Ds Mark II Aperture-priority AE @ 0 EC 24.0 mm 24.0 mm 1/40 sec f/4.0 ISO 200 Redmond, Washington
Laboratory TechniciansMap
This wasn't staged or anything. Wish I woulda shot at F/8. Oh well! Strobist info: 1/4th CTO + 1/4th Plusgreen stacked on 580EX II. Bounced 30 degrees behind on the ceiling with front spill card up for fill. Amazingly consistent lighting this way in this small room. Also worked almost perfectly for the strange mix of fluorescent lighting there.


Impromptu Portrait of Haley (1 of 2)

Canon EOS-1Ds Mark II Aperture-priority AE @ -5/3 EC 24.0 mm 24.0 mm 1/250 sec f/2.8 ISO 50 Redmond, Washington
Impromptu Portrait of Haley (1 of 2)Map
45 seconds of portrait time with Haley. Left eye is a little dark, and plane of focus is off. Not bad for winging it on the first shot :). Strobist info: non-gelled flash bounced 45 degrees up into the ceiling at 1/4th power. Just enough to balance the ambient light from the window.


Impromptu Portrait of Haley (2 of 2)

Canon EOS-1Ds Mark II Aperture-priority AE @ -5/3 EC 24.0 mm 24.0 mm 1/250 sec f/4.0 ISO 50 Redmond, Washington
Impromptu Portrait of Haley (2 of 2)Map
Waited for someone to walk into the BG before I took the shot. Strobist info: non-gelled flash bounced 45 degrees up into the ceiling at 1/4th power. Just enough to balance the ambient light from the window.

{ 0 comments }

I was fortunate enough to get some more lens data from Mr. Anton Largiader which I have added to the Canon Lens Handholdability post.

Changes include:

  • Table now contains 353 lenses (up from 147).
  • Added 200+ new lenses from Sigma, Tokina, Zenit, Zeiss, and Tamron.
  • Added the following newly released Canon lenses:
    • EF 300 f/2.8L IS II USM
    • EF 400 f/2.8L IS II USM
    • EF-S 18-135 f/3.5-5.6 IS
    • EF-S 15-85 f/3.5-5.6 IS USM
    • TS-E 17mm f/4L
    • TS-E 24mm f/3.5L II
    • EF 100mm f/2.8L Macro IS USM

I've also been able to add this new data to a SQL database in preparation for creating a tool which will let you query this lens list and factor in a few more variables into the handholdability analysis equation.  Stay tuned!

{ 0 comments }

Updates

Post updated 3/20:

  • Table now contains 353 lenses (a big thank you to Anton Largiader for the raw data).
  • Added 200+ new lenses from Sigma, Tokina, Zenit, Zeiss, and Tamron.
  • Added the following newly released Canon lenses:
    • EF 300 f/2.8L IS II USM
    • EF 400 f/2.8L IS II USM
    • EF-S 18-135 f/3.5-5.6 IS
    • EF-S 15-85 f/3.5-5.6 IS USM
    • TS-E 17mm f/4L
    • TS-E 24mm f/3.5L II
    • EF 100mm f/2.8L Macro IS USM

Post updated 3/7:

  • Added disclaimer, added additional assumptions to conditions for handholdability testing section.

Disclaimer

After some discussion across various communities, it is obvious that people think I am trying to come up with some kind of panecea to finding out which lens is better than another from a handholdability perspective.  That is not my goal.  My goal is to create a theoretical framework for which we might begin to compare lenses to one another under very specific circumstances.  Read the conditions below and keep these in mind when you look at the final results.  I have added several marked in red to indicate some excellent points brought up in discussing this work.

Eventually, of course, I hope to improve this framework.  Please do consider this a v.1 effort :).

Conditions for Handholdability Testing

I did some math tonight where I calculated the " maximal handholdability" of various lenses under certain conditions.  The conditions, as such, are laid out below:

  1. Photos are being taken of static subjects.
  2. We follow the 1/focal length rule for "safe hand-holding" to ensure reasonably sharp shots.
  3. We do not differentiate between FF and 1.5x, or 1.6x sensor sizes when calculating safe handholding speeds.
  4. We DO factor IS into the equation – 2 stops of IS is equivalent to 2 aperture stops (because we are assuming static subjects).
  5. We always use the MINIMUM focal length of the lens as a benchmark.
  6. We always use the MAXIMUM aperture value of the lens as a benchmark.
  7. IS benefits are based on manufacturer's claims, are measured in whole f-stops, and are not necessarily tied to real-world results.
  8. [added 3/7] We do not take into account lens weight, balance, or weight distribution, which are very important when handholding a lens.
  9. [added 3/7] We do not factor in innate photographer skill / technique / body types, which are also key factors in handholding a lens.
  10. [added 3/7] We do not factor in real-world IS improvements which are not captured in direct manufacturer's claims.  For example, any hybrid IS improvements in the new Canon V. II telephoto lenses are not taken into account here.
  11. [added 3/7] While t-stops would be a more effective measure for "actual amount of light hitting the sensor," we currently do not factor this into our equation.
  12. [added 3/7] We do not factor in variable lens aperture, which has an impact on overall handholdability, not maximal handholdability (which is what we care about).
  13. [added 3/7] IS is known to become more effective at longer focal lengths, we do not take this into account.

With these assumptions, the handholdability of a lens only varies with the following parameters:

  • The minimum focal length of the lens.
  • The maximum aperture of the lens.
  • Any claimed image stabilization advantages.

We can also infer the following rules from these parameters:

  • Longer focal lengths decrease handholdability (inverse relationship).
  • IS increases handholdability (direct relationship).
  • Wider apertures increase handholdability (direct relationship).

Picking a Measure for Handholdability

There are a couple scenarios to consider when measuring how much light a lens is usable in.  The first is when comparing one lens to another, directly.  The second is when comparing a set of lenses amongst themselves.  These two scenarios may seem the exact same, but there is a key difference.  When comparing 2 lenses directly, we need only to answer the following 2 questions: "what is the difference in their apertures" and "what is the difference between their focal lengths."  When comparing a set of lenses, things become a bit more complicated, because we need a generic measure for a single lens's handholdability.  So, let's first go about deriving a formula to compare one lens to another, and then we can go about the task of making a generic measure for handholdability.

Scenario 1: Comparing 2 Lenses Directly

Our first task is simple: relate aperture and focal length together into some arbitrary measurement of handholdability.  For example, it makes logical sense that a 24 mm lens can be safely used in lower light than a 50 mm lens of the same max aperture.  Why?  Because you can handhold the 24mm lens in 1 stop lower light (1/25th of a second vs 1/50th of a second) than the 50mm lens simply because of the difference in focal length.  It also makes logical sense that given two lenses of identical focal length, the lens with the wider max aperture is handholdable in lower light.  Neither of these cases needs explaining by themselves; however, when they are related together is when things get interesting.  Using the rules I have defined above, we realize that an 85mm f/1.2 lens is actually less handholdable than a 14mm f/2.8 lens.  Why?  Because the combination of smaller aperture and shorter focal length of the 14mm combined still add up to a lens useable in lower light.  How so?  Read on.

Step 0: Taking IS into Account (or, Calculating Relative Max Aperture)

Before we can discuss F/numbers and aperture, we need to take a quick aside on how we deal with lenses which have IS.  We'll call this measure relative max aperture, and it will depend on if we have any IS improvements to take into account.  For example, if a lens has an f/2.8 maximum aperture opening and offers 4 stops of IS improvement, the relative max aperture would be f/1 (from the progression 2.8, 2, 1.4, 1).  The formula we use to calculate this is below:

  • r = relative max aperture
  • a = max aperture of the lens
  • i = stops of is improvement

(1)   \begin{equation*} 	\large{r = 2^{-i/2}*a} 	\end{equation*}

Whenever you are calculating the max aperture of a lens, be sure to take this into account (remember, only works for static subjects!)  We will not use this formula until much later in our discussion.

Step 1: Find How F/Number Varies with Aperture Area

Ok, now that IS is out of the way, we first need to calculate the number of stops difference between the two lenses.  We already know that aperture varies with the square root of 2.  Why?  Because each 1 stop increase in F/number represents a halving of the area of the aperture opening:

How aperture opening size relates to f/number

There is a pattern we can discover in the table above.  Namely, every time the F/number increases exponentially with √2, the aperture area doubles.  Because a doubling of the aperture area represents an increase of 1 stop of light hitting the sensor, we can codify this relationship as follows: "how many times must we double the area of the aperture opening of the slower lens to equal the area of the aperture opening of the faster lens?" The equation below expresses this relationship:

  • afast = area of the aperture opening of the faster lens
  • aslow = area of the aperture opening of the slower lens
  • dav = number of doublings of aperture value

(2)   \begin{equation*} 	\large{a_{slow}*2^{d_{av}}=a_{fast}} 	\end{equation*}

Step 2: Find How to Writing the Above Formula in Terms of F/Number

Now, while this formula is interesting, we want it in terms of F/number, not aperture opening area.  If you remember, I mentioned above that every power of √2 increase of the F/number leads to a doubling of the aperture area.  Because of this relationship, we can say simply replace the doubling factor in our above equation with the √2, to answer the question "how many times must we increase the F\number of a faster lens by √2 to equal the F\number of a slower lens?"  E.g.:

  • fslow = F/number of the slower lens
  • ffast = F/number of the faster lens
  • dav = number of doublings of aperture value

(3)   \begin{equation*} 	\large{f_{fast}*\left(\sqrt{2}\right)^{{d_{av}}}=f_{slow}} 	\end{equation*}

You may notice that we've swapped the location of the slow and fast lens in the below.  This is because area varies inversely with the F/Number.

Step 3: Solve the Equation Above for the Number of Doublings (Stops)

Given this, we are ready to solve this equation for x, which will give us the number of stops of difference between two F/numbers.

First, divide both sides by fslow

(4)   \begin{equation*} 	\large{\left(\sqrt{2}\right)^{{d_{av}}}=\frac{f_{slow}}{f_{fast}}} 	\end{equation*}

Now, take the log base √2 of both sides to remove the exponent…

(5)   \begin{equation*} 	\large{d_{av}=\log_{\sqrt{2}}{\frac{f_{slow}}{f_{fast}}}} 	\end{equation*}

Then convert to log base 10 by dividing the right sides by log(√2)…

(6)   \begin{equation*} 	\large{d_{av}=\frac{\log{\frac{f_{slow}}{f_{fast}}}}{\log{\sqrt{2}}}} 	\end{equation*}

If you know log rules, this should look familiar, because we can now simplify it to…

(7)   \begin{equation*} 	\large{d_{av}=\frac{\log{f_{slow}}-\log{f_{fast}}}{\log{\sqrt{2}}}} 	\end{equation*}

Step 4: Find Out a Method for Accounting for Focal Length

So, we see that the 85/1.2 is approximately 2.5 stops faster than the 14/2.8.  Now, the only thing left to do now is to take into account the difference in focal lengths.  To do so, we need to answer the question "how many times must we double the shorter focal length to equal the longer focal length."  This question is derived from how shutter speeds work.  As we already know, as you change aperture size, the shutter speed varies inversely with the square of the difference.  The same applies to focal length when using the 1/focal length handholdability rule.  For every doubling of the focal length, we effectively lose 1 stop of handholding power.  So, in comparing a 24mm lens to a 50mm lens, we can deduce that the 24mm lens is approximately twice as handholdable.  This relationship is expressed in the following equation:

  • lshort= short focal length
  • llong= long focal length
  • dfl = number of doublings of focal length

(8)   \begin{equation*} 	\large{{l_{short}}*2^{{d_{fl}}}={l_{long}}} 	\end{equation*}

Looks similar, right?  It should, it's exactly the formula we derived above, but with a different doubling factor.  This time, we know that to find the difference between two focal lengths, we just need to apply a straight factor of 2, not some root of 2 madness we had to deal with when concerning ourselves with the F/Number.  We'll derive this formula in almost exactly the same way as we did the previous. 

First, divide both sides by lshort

(9)   \begin{equation*} 	\large{2^{{d_{fl}}}=\frac{{l_{long}}}{{l_{short}}}} 	\end{equation*}

Now, take the log base 2 of both sides to remove the exponent…

(10)   \begin{equation*} 	\large{\log_2{{d_{fl}}}=\log_2{\frac{{l_{long}}}{{l_{short}}}}} 	\end{equation*}

Then convert to log base 10 by dividing both sides by log(2)…

(11)   \begin{equation*} 	\large{{d_{fl}}=\frac{\log{\frac{{l_{long}}}{{l_{short}}}}}{\log{2}}} 	\end{equation*}

If you know log rules, this should look familiar, because we can now simplify it to…

(12)   \begin{equation*} 	\large{{d_{fl}}=\frac{\log{{l_{long}}}-\log{{l_{short}}}}{\log{2}}} 	\end{equation*}

Step 5: Compare to our Previous Formula

Which is ALMOST exactly what we used to calculate the differences in stops of the lens aperture value. 

(13)   \begin{equation*} 	\large{\frac{\log{{l_{long}}}-\log{{l_{short}}}}{\log{2}}}\longleftrightarrow{\frac{\log{{f_{fast}}}-\log{{f_{slow}}}}{\log{\sqrt{2}}}} 	\end{equation*}

What is the difference?  Let's compare the two equations.  As you can see, the only difference is what logarithm is on the bottom of the equations.  Think of the value inside the bottom logarithm in the equations below as "the factor which represents a doubling of the value."  For example, in the formula relating aperture openings, we know that the F\number is derived from powers of the square root of 2, as follows from our table above above.  When we go from, say, F/1 to F/1.4, we also know that we lose a stop of handholdability, and that those values are related with the square root of 2.  Similarly, in the formula relating focal length, we know that each time the focal length doubles, we lose a stop of handholdability, and that these values are related with a straight doubling factor of 2.

Step 6: Plug in Values and Evaluate

So, now we have a formula for finding the difference in f-stops of handholdability between two lenses given their apertures, and another formula for finding the difference in f-stops of handholdability between two lenses given their focal lengths.  Let's compare the Canon 85/1.2 to the Canon 14/2.8 and see, once and for all, which is more handholdable.  First, to find the difference in maximum aperture of the two lenses:

  • fslow = 2.8
  • ffast = 1.2
  • dav= ?

(14)   \begin{equation*} 	\large{d_{av}=\frac{\log{f_{slow}}-\log{f_{fast}}}{\log{\sqrt{2}}}} 	\end{equation*}

(15)   \begin{equation*} 	\large{d_{av}=\frac{\log{2.8}-\log{1.2}}{\log{\sqrt{2}}}} 	\end{equation*}

(16)   \begin{equation*} 	\large{d_{av}=\frac{0.84729}{\log{\sqrt{2}}}}\approx{2.44478} 	\end{equation*}

So, the 85/1.2 is approximately 2.4 stops brighter than the 14/2.8.  We still need to take into account the focal lengths, however, which is where things get interesting:

  • lshort= 14
  • llong= 85
  • dfl = ?

(17)   \begin{equation*} 	\large{{d_{fl}}=\frac{\log{{l_{long}}}-\log{{l_{short}}}}{\log{2}}} 	\end{equation*}

(18)   \begin{equation*} 	\large{{d_{fl}}=\frac{\log{85}-\log{14}}{\log{2}}} 	\end{equation*}

(19)   \begin{equation*} 	\large{{d_{fl}}=\frac{1.80359}{\log{2}}}\approx{2.60203} 	\end{equation*}

Step 7: Analyze the Results

Now, when we look at the results of this last equation, we see the surprise (at least to me :))  Even though the 85/1.2 is 2.4 stops brighter than the 14/2.8, the 14/2.8 is still more handholdable because it's shorter focal length makes it useable at shutter speeds that are 2.6 stops slower than the 85/1.2!  We can make this relationship generic such that we can have a single formula that can answer the question "given two lenses, which is more handholdable?"  First, we assume that that the faster of the two lenses will always be more handholdable (with IS taken into account), therefore:

  1. The slower lens is more handholdable than the faster lens if and only if it has a sufficiently short focal length:

(20)   \begin{equation*} 	\large{{d_{av}}<{d_{fl}}} 	\end{equation*}

(21)   \begin{equation*} 	\large{\frac{\log{f_{slow}}-\log{f_{fast}}}{\log{\sqrt{2}}}<\frac{\log{{l_{long}}}-\log{{l_{short}}}}{\log{2}}} 	\end{equation*}

Step 8: Compare Lenses with our Formula

So, let's compare some Canon lenses and see how they stack up against one another:

Comparing various Canon lenses in terms of handholdability in low light.

Here is how you interpret this table:

  1. If the final column (dfl-dav) is negative, then you know that the longer lens is more handholdable.
  2. If the final column is positive, then you know that the shorter lens is more handholdable.
  3. If they are equal, then there is no difference in handholdability between these two lenses.

So, let's discuss each table row and what they mean in the real world:

  1. The 35/1.4 is 1/3rd of a stop more handholdable than the 28-135/3.5-5.6 IS, despite the 2 stop IS improvement of the latter.
  2. The 50/1.4 is 1/3rd of a stop more handholdable than the 10-22/3.5-4.5.
  3. The 70-200/2.8 I IS is 1/3rd of a stop less handholdable than the 55-200/4-5.6 IS.
  4. The 50/1.0 is 1.5 stops(!) less handholdable than the 17-55/2.8 IS.

Scenario 2: Comparing the Set of All Lenses

Now that we've found a formula to compare two lenses directly based on differences in their focal lengths and apertures, we can discuss how we might adapt this knowledge to create a general formula for comparing any number of lenses to one another.  To do this, we must find a measurement that relates aperture and focal length to some direct measure of how dark a scene is.  This is actually very straightforward, and the photographic community already has a way to measure it: Exposure Value.  Exposure value is defined as "a measure which denotes all the combinations of a camera's shutter speed and aperture which give the same exposure at ISO 100," and will allow us to find a single number to represent how little light a lens can be safely handheld in.  You can think of EV as relating directly to the amount of light present in a given scene.  In fact, photographers already have another measure for the amount of light present in a scene.  This measure is called "Light Value", or LV, and it is an ordinal value which is calculated in stops and is defined such that LV(0) = the light level that requires an exposure of 1 second at f/1 at ISO 100 (ie, very dark).  Let's take a look at common light values, how they relate to EV, and then how EV is calculated.

Step 0: Understanding Light Value and How it Relates to Exposure Value

When we think about the handholdability of a particular lens, one interesting question we might ask is how dimly lit a scene we can shoot sharply with a given scene.  As we discussed above, light value measures, effectively, how bright or dark a scene is.  It does so by pegging a value of zero at a given brightness, and then letting all other values fall as they may.  Each increase of 1 LV represents an increase of 1 stop.  You can see an example of light values and how they map to particular scenes below (data taken from wikipedia, kenrockwell.com, and photokaboom.com).
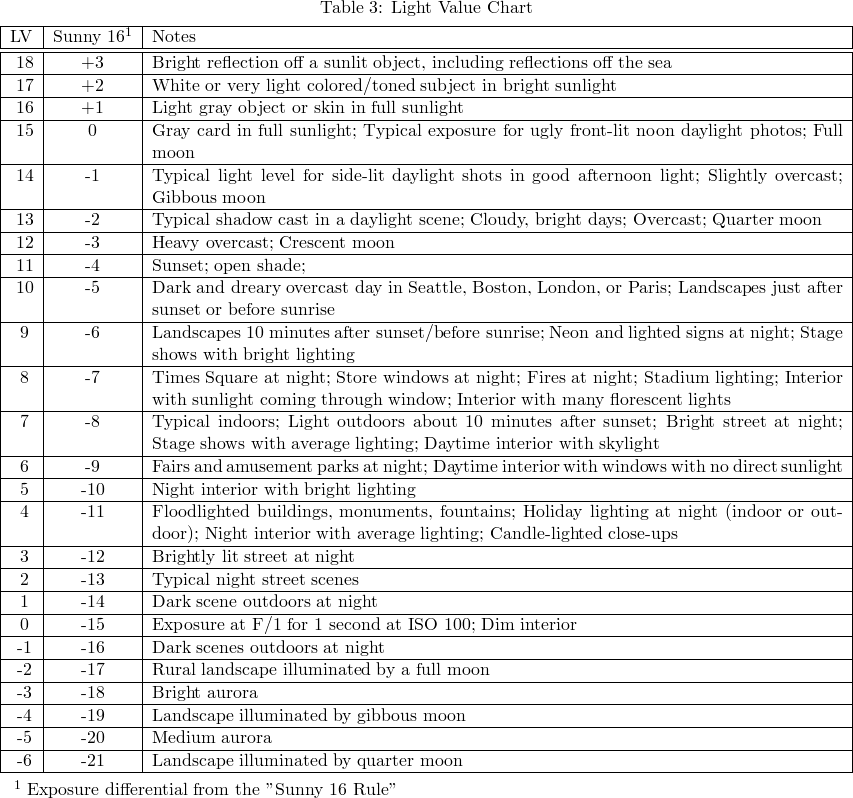
Light Value Table

So, how is light value related to exposure value?  Quite simple:

EV = LV @ ISO 100

This means that, as long as we are at ISO 100, LV = EV.  As soon as we increase ISO, however, we must change the equivalent EV to compensate for the difference.  For example, if you are shooting a sunset and want to know what exposure to make at ISO 800, you would first look up the appropriate LV for that scene, which in this case is 8, and then compensate for the increased ISO by shifting the corresponding EV up by 3 stops (since ISO 800 is 3 stops more exposure than ISO 100).  So, in this case, you would choose an exposure which is aligned with LV(11), and you would say that your sunset scene has an exposure value at ISO 800 of 11, or, in other terms: EV800 = 11.  If you have an F/2.8 lens available to you, you can look at an EV chart and learn that the exposure you need is 1/250 @ F2.8.  Below is a table of common exposure values so that you can see once and for all how LV, EV, and given camera settings are related.
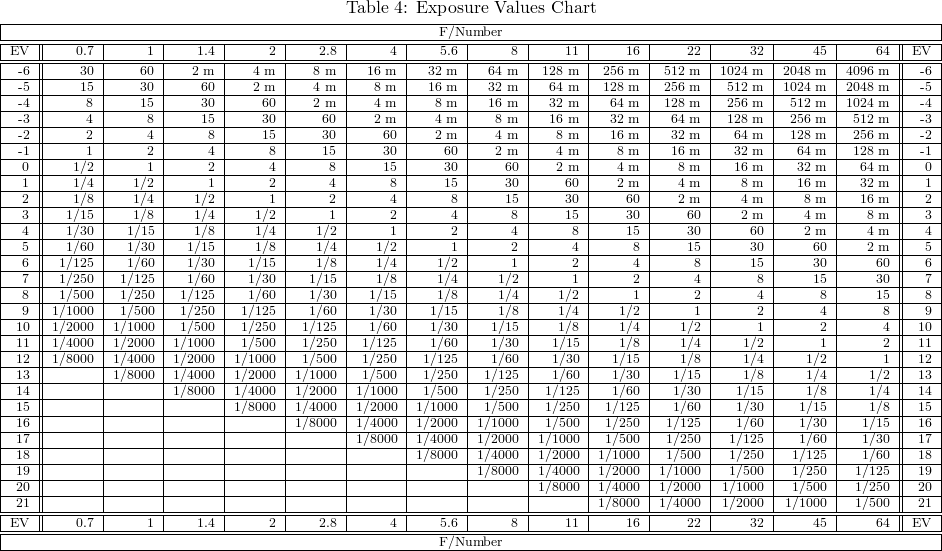
Exposure Values Chart

Step 1: Examine How EV is Calculated

The formula for calculating EV is below:

  1. N = F/Number
  2. t = shutter speed

(22)   \begin{equation*} 	\large{$EV$=\log_{2}{\frac{N^2}{t}}} 	\end{equation*}

Remember, we need to get this formula in terms of F/Number (which it already is) and Focal Length (which it isn't).  So how can we get focal length into the equation?  Well, remember the golden rule of handholdability relates just that, focal length to shutter speed, e.g shutter speed at a minimum must be equal to 1/focal length.

Step 2: Refactor the EV Equation in Terms of Focal Length

  1. N = F/Number
  2. t = shutter speed = 1 / focal length = 1 / f

(23)   \begin{equation*} 	\large{$EV$=\log_{2}{\frac{N^2}{\frac{1}{f}}}} 	\end{equation*}

So what does this formula tell us?  Simple: "the lowest exposure value at which a given lens at maximum aperture can be handheld."  This may seem innocuous, but it allows us to assign a single numeric value to any lens which indicates its innate handholdability.  This is obviously very powerful, because now, all we need is a list of lenses, and we can find some interesting data.  Fortunately for us, a giant list of Canon lenses is only a click away (used from to Gallery1.co.uk).

Step 3: Plug in Values and Examine Results

Without further ado, here's a bunch of data!  First, a chart which shows many of the current Canon lenses and their associated handholdability ratings.  Second, a graph which relates this data visually.  A couple of surprises from this data:

  1. The most handholdable lens is…the 15-85 3.5-5.6 IS USM!  This is mainly due to its 4 stop IS and relatively wide maximum aperture.  Take this with a grain of salt, as it's actually equivalent to a 28.8 mm lens on your favorite crop body (but who changes their 1/focal length rule when shooting crop anyway!).
  2. The EF 200/2 IS is quite high in handholdability.  Mainly due to its MASSIVE aperture and 5 stop IS.
  3. Lots of commodity lenses are in the top 20: 15-85, 18-55, 18-200, 17-85, 55-250…just goes to show that you don't need to buy L if you are shooting still subjects in the dark!
  4. Surprisingly, the super fast primes are slightly lower in the list than expected – #10 for the 24/1.4, and #12 for the 50/1.0.
  5. The 70-200/2.8 IS version 1 is no slouch in 13th place.  The newer version would beat out even some of the fast primes, since it gains a stop in IS improvement.

Canon Lens Handholdability Chart

Canon Lens Handholdability Graph

Conclusions and Next Steps

Well, if you've read this far, I applaud you.  I've tried to make this post as readable as possible, and would really appreciate feedback in that regard.  To summarize, we've learned:

  1. What to care about when discussing handholdability, namely max aperture, and focal length.
  2. How to relate focal length and max aperture together to compare one lens directly to another.
  3. What EV and LV are and why they matter for this discussion.


  4. How EV and LV can lead to us to a more generic solution for all lenses.

If you would like to download the spreadsheet which contains the data I've laid out in the chart and graph above, you can get it below.  Please, if you use this data or information on your site, send a friendly pointer my way.

Canon Lens Handholdability Analysis (XLS)

Canon Lens Handholdability Analysis (XLSX)

In the future, I hope to codify this data into an interactive tool that allows people to play with some variables that I have left out for this discussion.  I hope you have found this useful, I know I have!


Happy shooting!

{ 1 comment }